

Set up SSO with Microsoft Azure AD B2C
This step-by-step guide explains how to set up single sign-on (SSO) in Contentstack with Microsoft Azure Active Directory (AD) B2C as your SAML 2.0 identity provider (IdP).
You can attach up to five SAML 2.0 IdPs to a single Contentstack organization. Each IdP is a separate connection with its own certificate, session policy, role mapping, and login URL, which is useful when an Azure AD B2C population, such as external contributors, shares an organization with a corporate directory population. This guide walks through one connection. To add and organize more connections, refer to Configure Multiple Identity Providers.
In a nutshell, this integration requires the following steps:
- Create a Connection in Contentstack
- Configure Contentstack App in Microsoft Azure AD B2C
- Configure Microsoft Azure AD B2C Details in Contentstack
- Add Users to Your Microsoft Azure AD B2C Application
- Manage Users, Test, and Enable SSO
Prerequisites
- Contentstack account
- The organization owner role, a security manager role, or a custom role with SSO write permissions in your Contentstack organization
- Active Microsoft Azure AD B2C subscription
What You Will Learn
- How to create a connection and generate the ACS URL in Contentstack.
- How to register and configure the Contentstack app in Azure AD B2C.
- How to configure the Azure AD B2C IdP details in Contentstack, by metadata or manually.
- How to add users, then test and enable the connection.
Create a Connection in Contentstack
Note: SSO can be configured by the organization owner, a security manager, or a user with a custom role that has SSO write permissions.
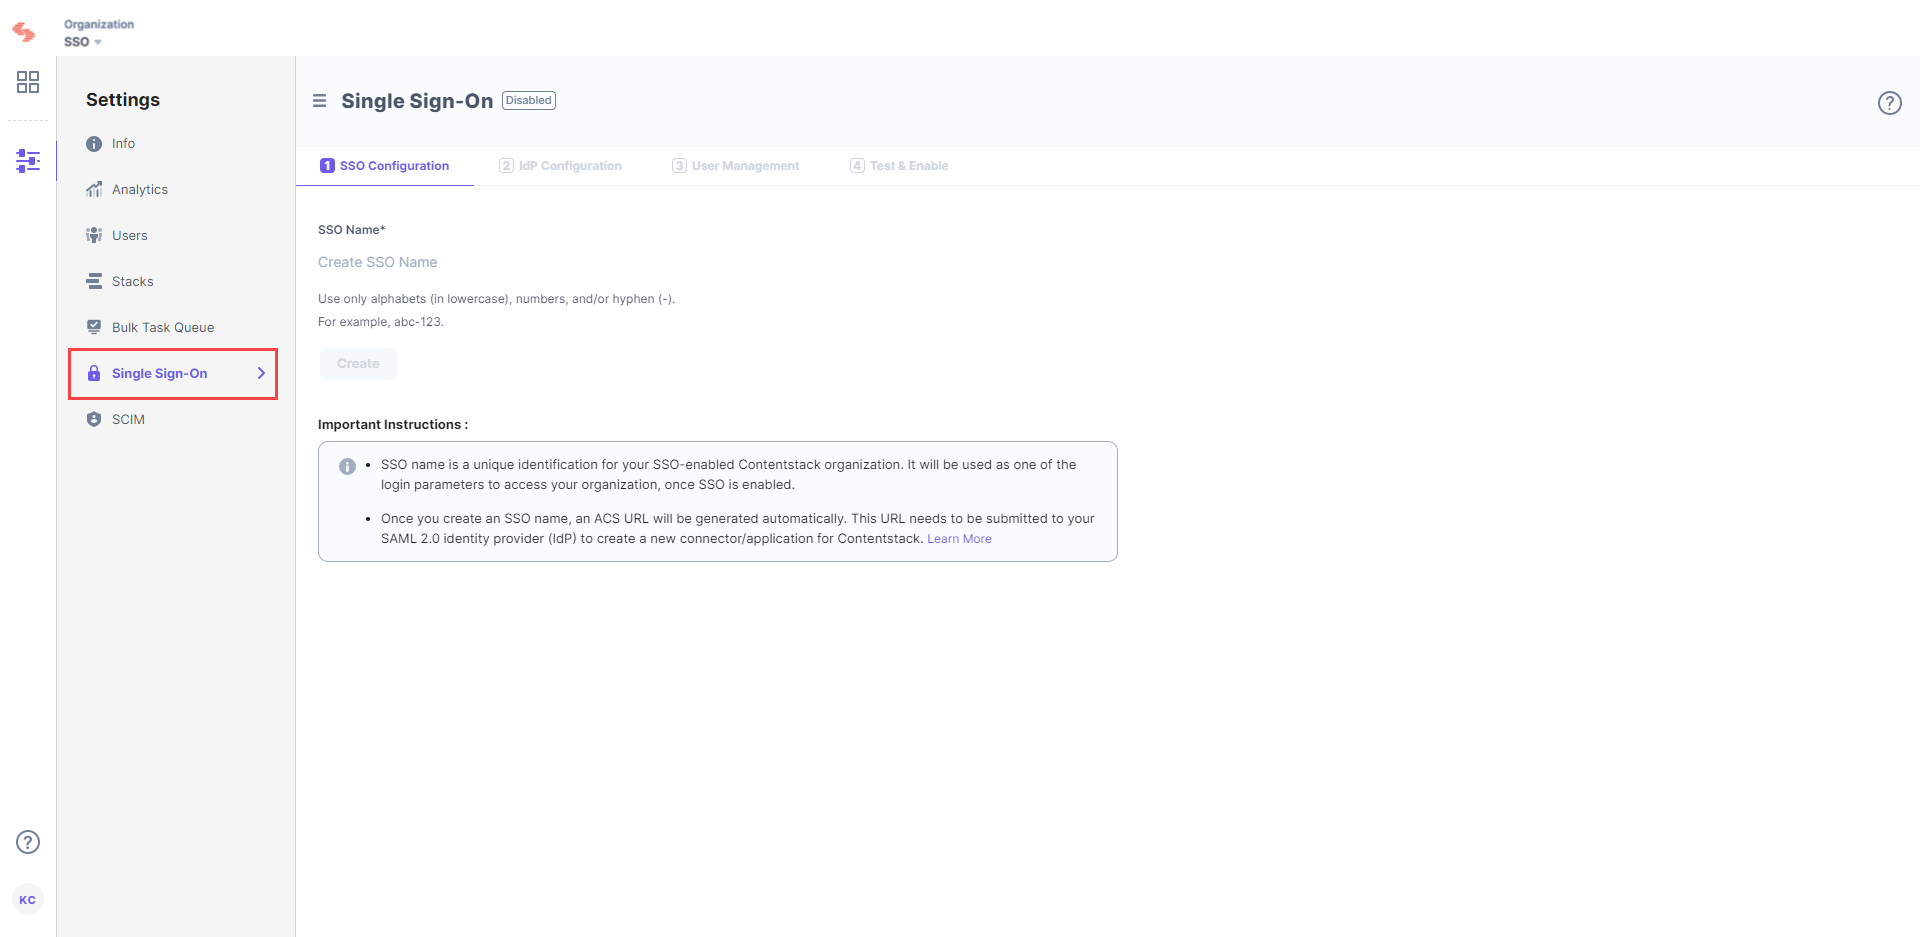
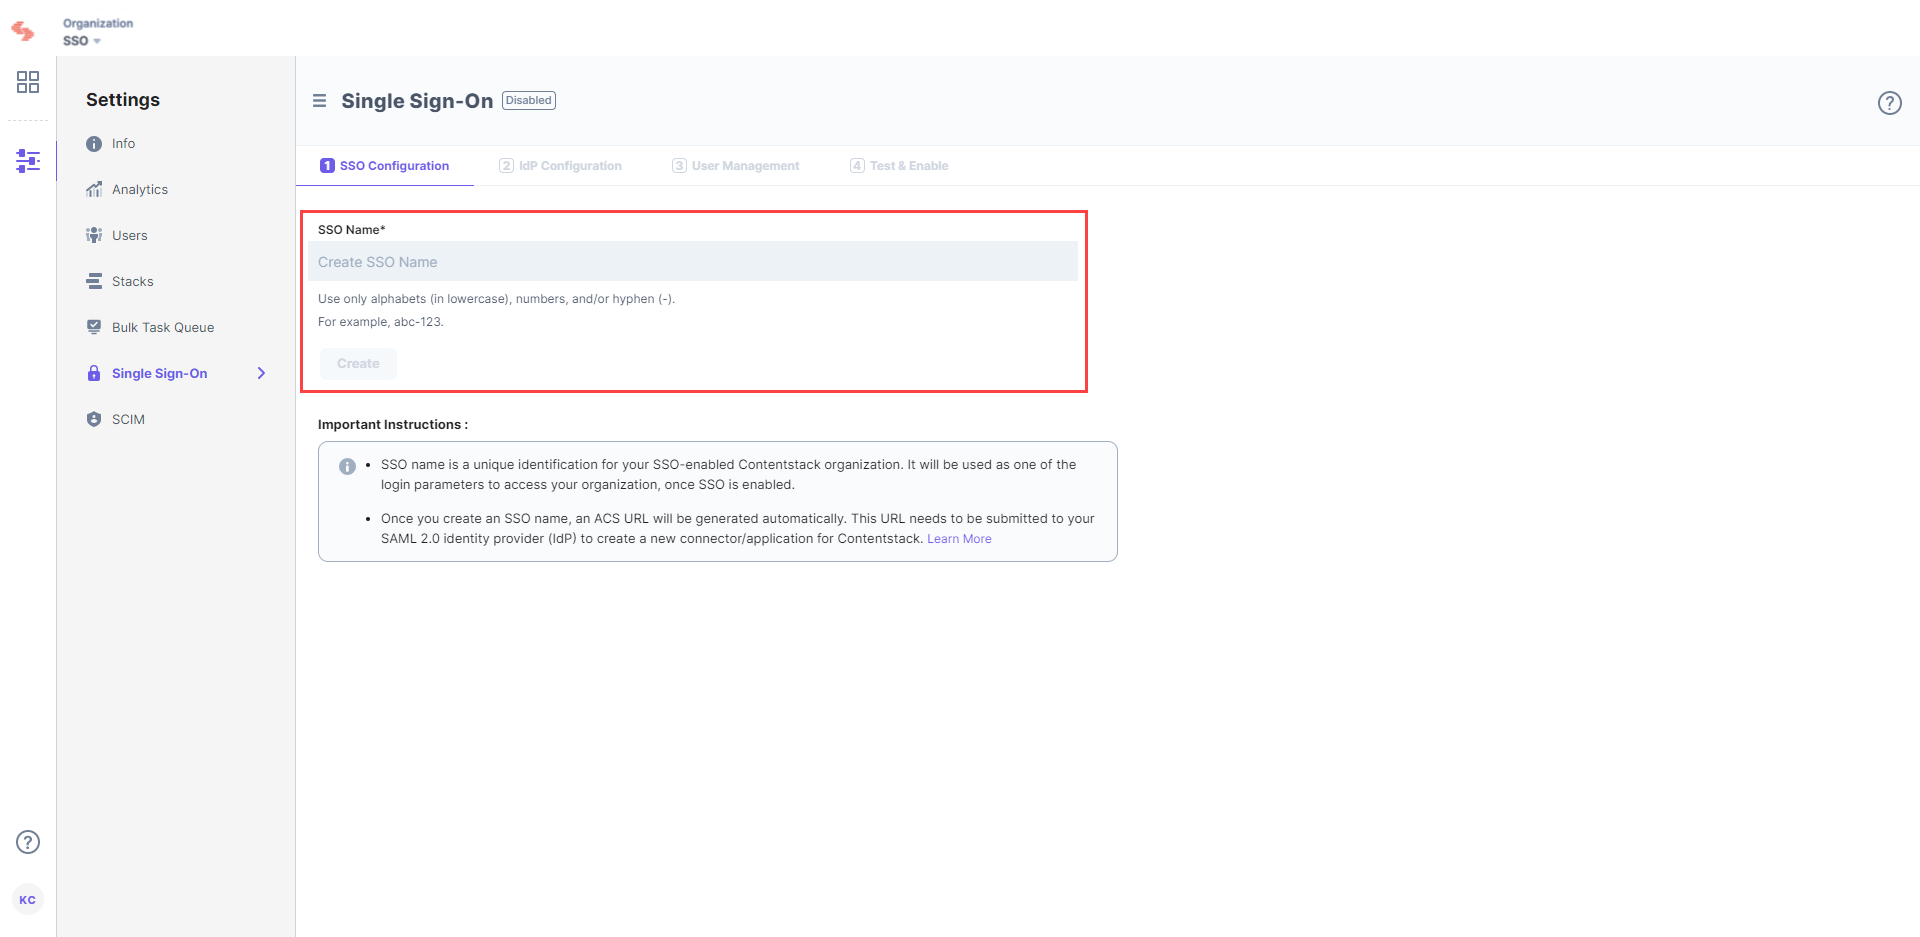
Log in to your Contentstack account, open the App Switcher, go to Administration, and then click Single Sign-On.
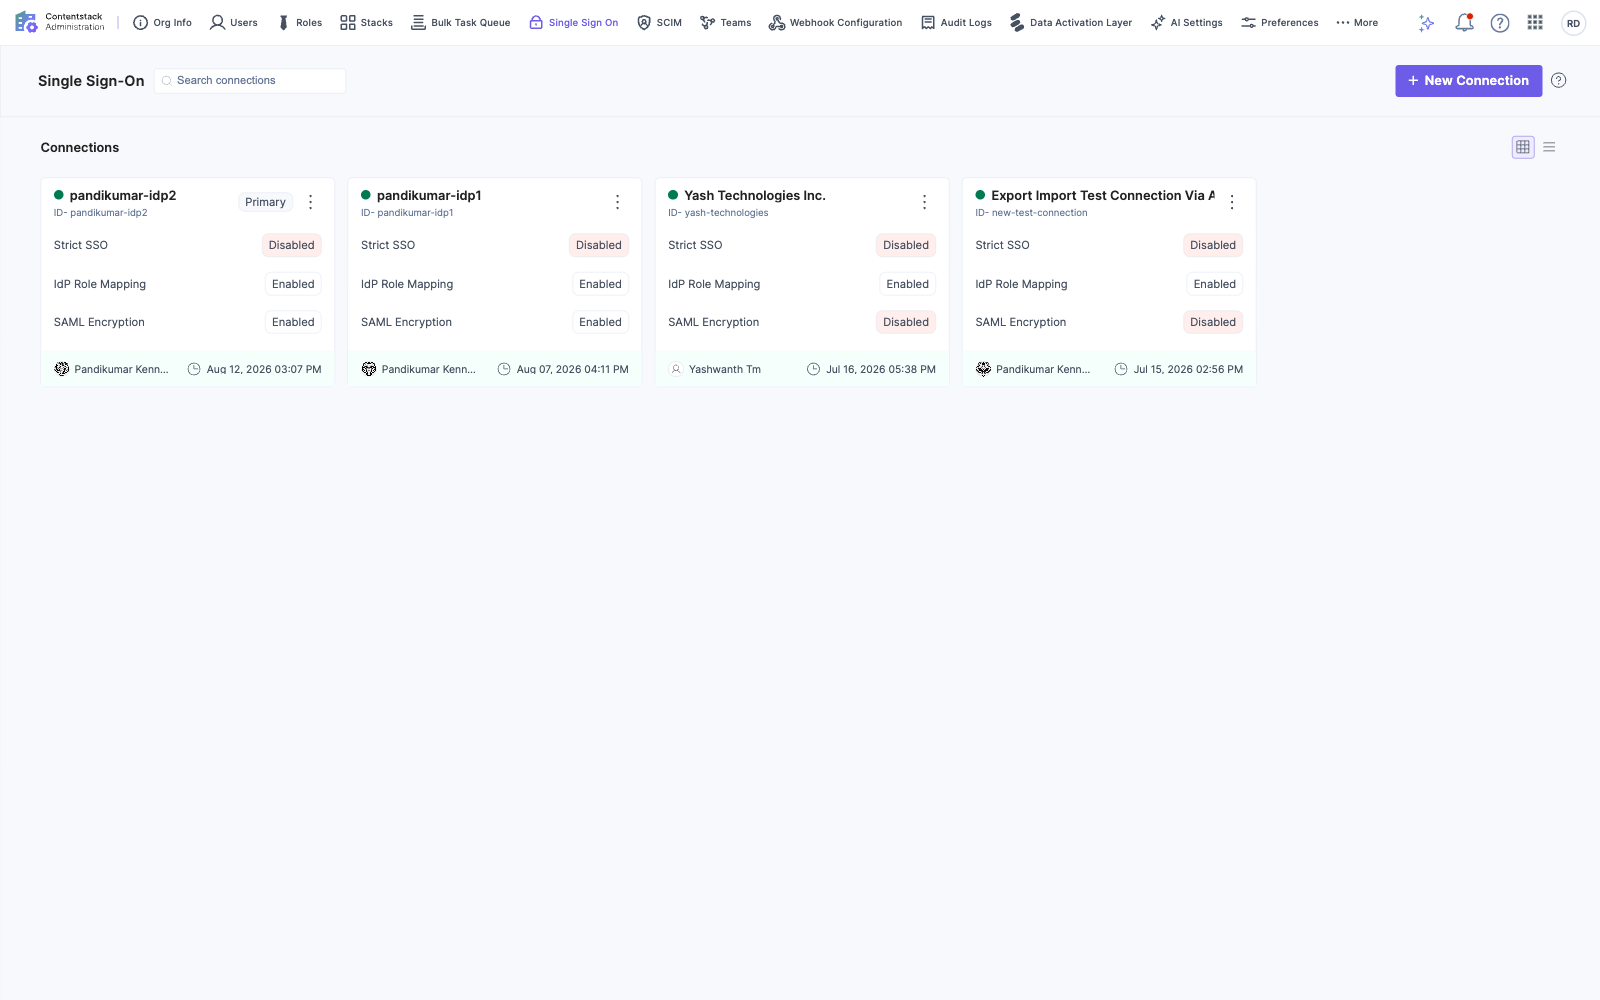
Add a connection to open the New Connection dialog, and enter the following details:
- Connection Name: A friendly name shown across SSO surfaces. It does not affect login URLs. For example, "Acme External Contributors."
- SSO ID: The unique identifier for this connection. Contentstack auto-generates it from the connection name, and you can edit it before you create the connection. Users enter it as one of the login parameters once SSO is enabled.
- Description (optional): Context about this connection, up to 400 characters.
Note: The SSO ID can contain only lowercase letters, numbers (0-9), and hyphens (-). You cannot change the SSO ID after you create the connection. SSO IDs are unique across all Contentstack organizations, so a name already in use elsewhere is rejected.
Let's use "sso-test" as the SSO ID.
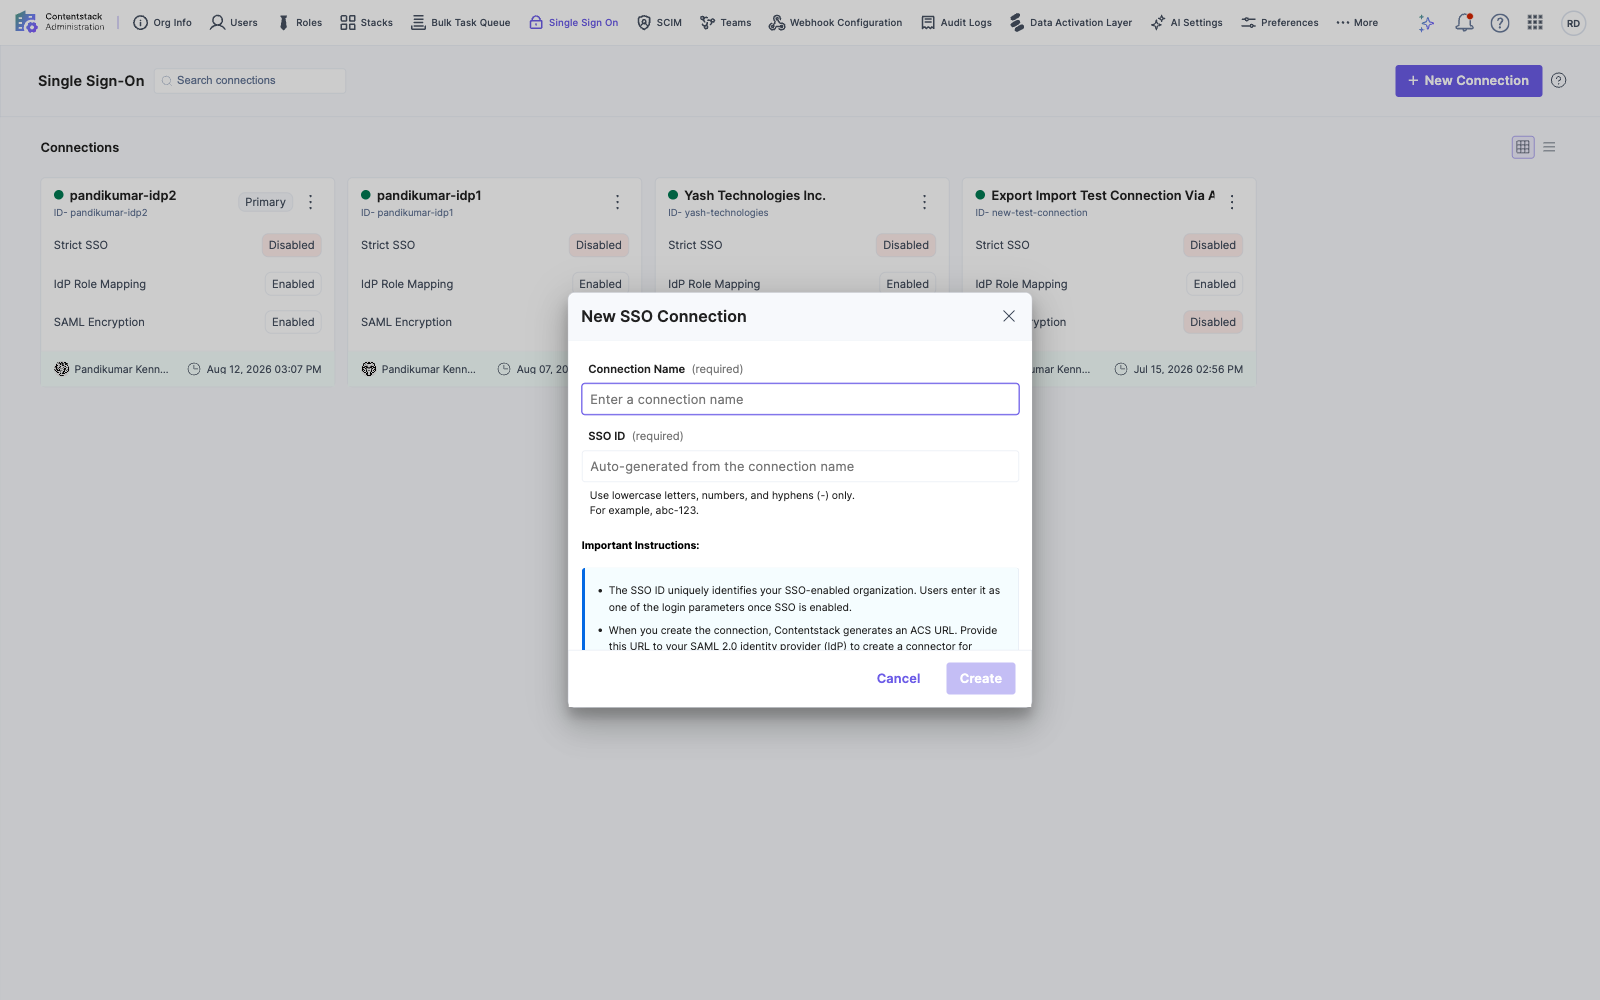
Click Create.
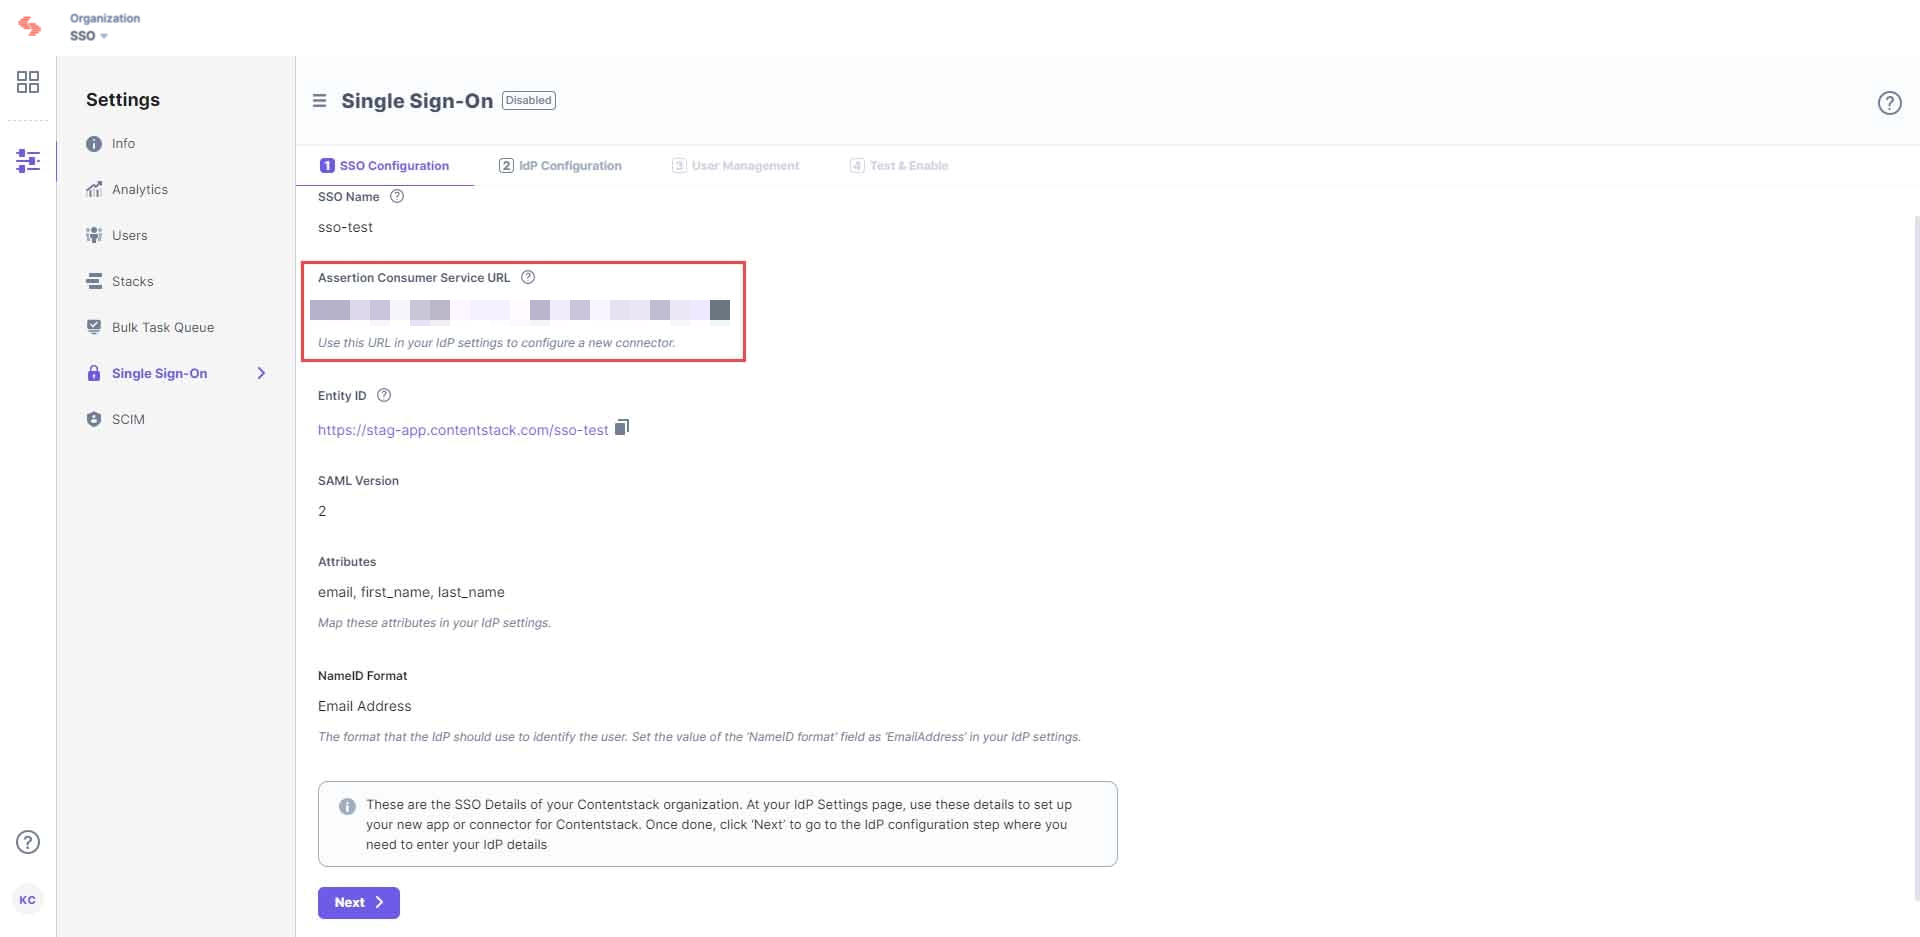
Contentstack opens the connection at 1. SSO Configuration and generates the Assertion Consumer Service (ACS) URL, along with read-only details such as Entity ID, SAML Version, Attributes, and NameID Format. You need these details in Step 2. Keep this window open.
Note: The ACS URL contains this connection's SSO ID, so every connection in your organization has its own ACS URL. Use the ACS URL of the connection you are configuring.
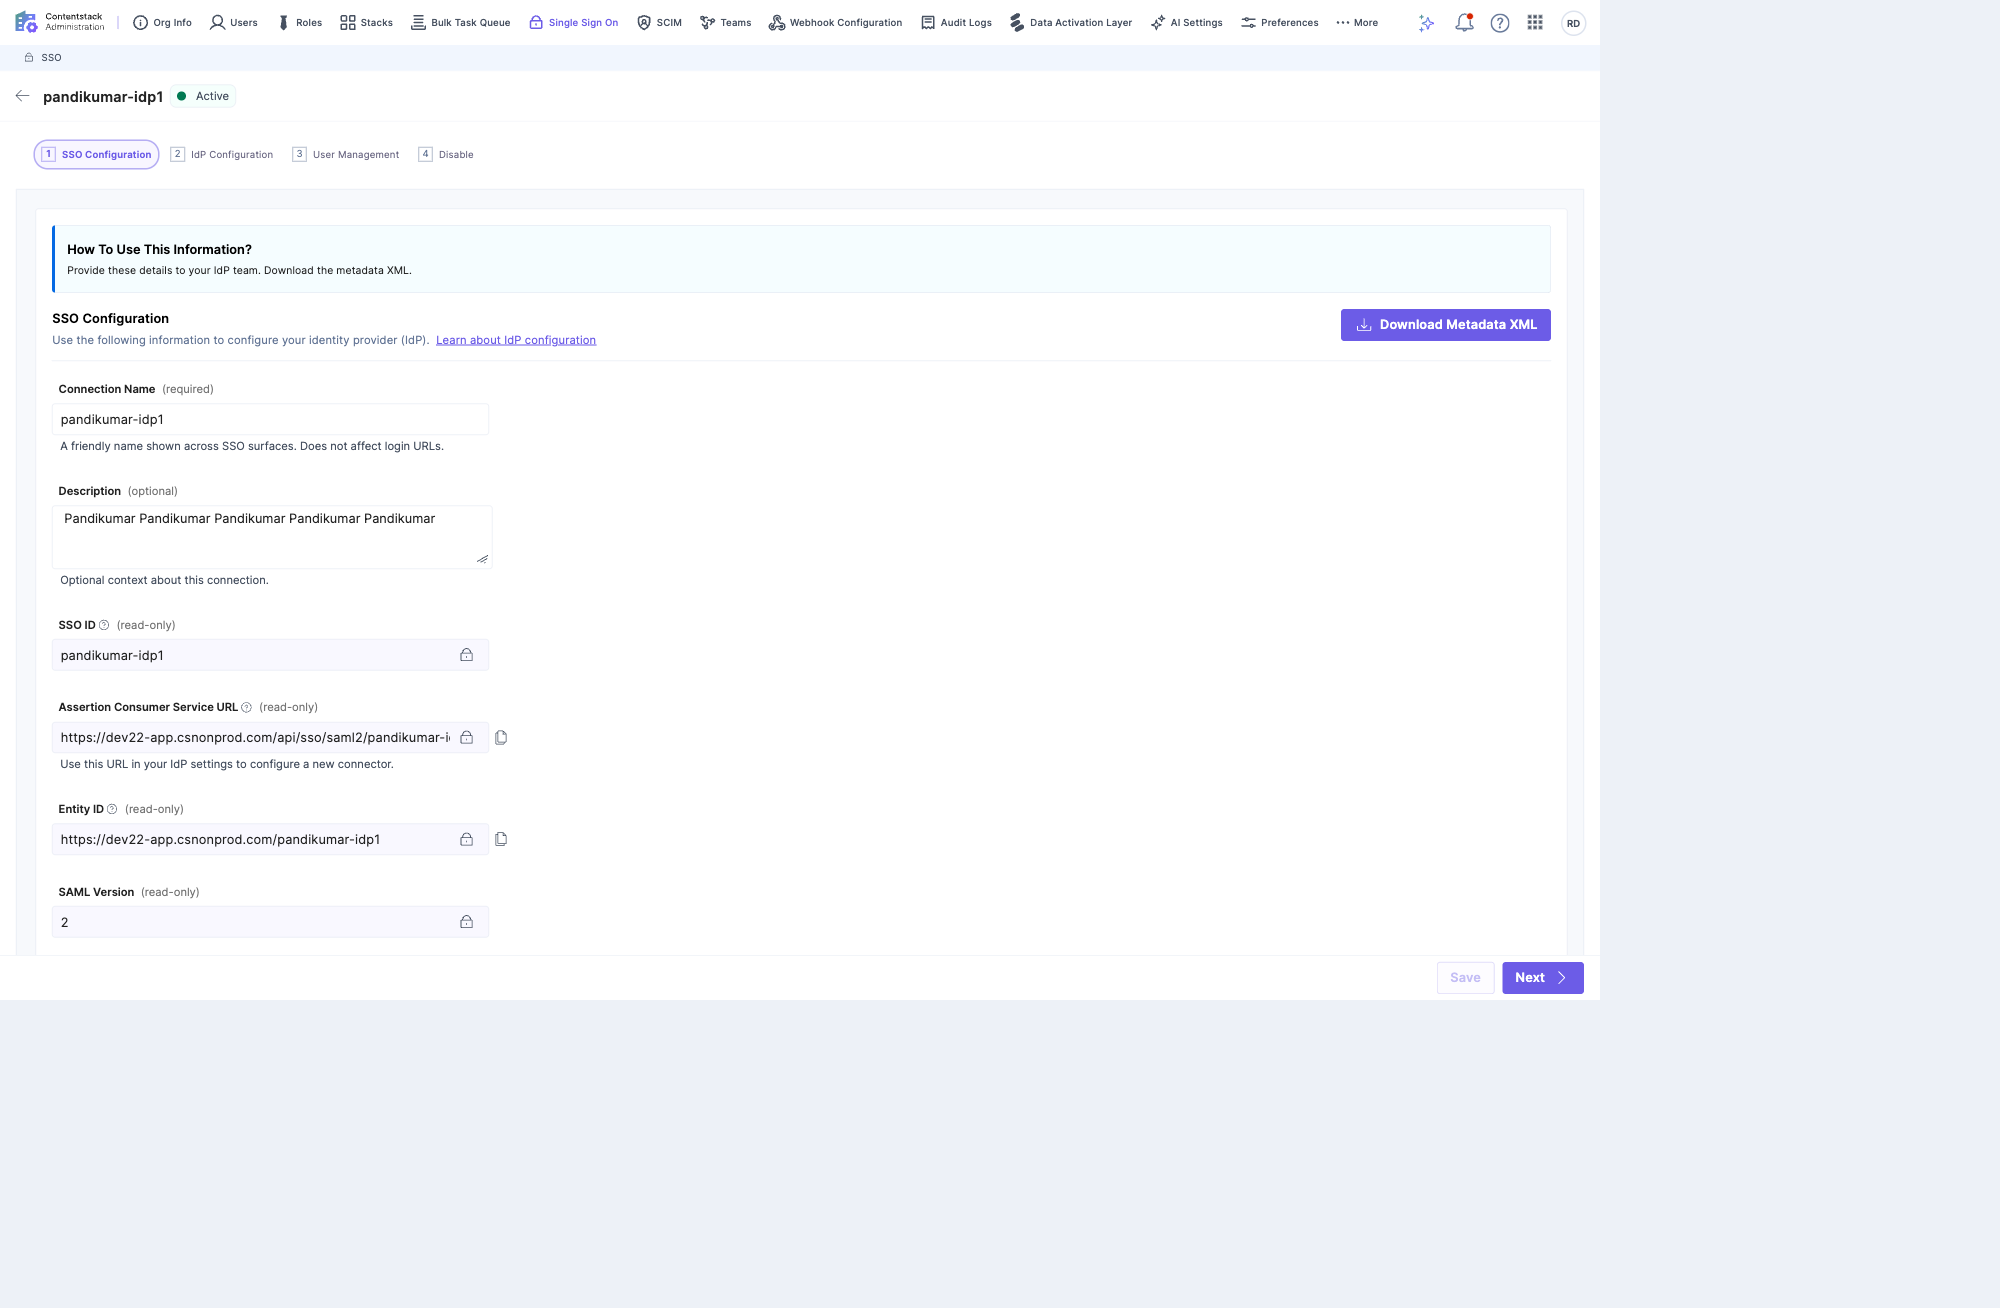
Tip: Instead of copying the ACS URL and Entity ID individually, share Contentstack's service provider (SP) metadata with your Azure AD B2C administrator in one step. Use Download Metadata XML. If you enable SAML encryption on this connection, the downloaded metadata also carries the public certificate your IdP uses to encrypt assertions. You can download that certificate on its own from the Contentstack public certificate link. For details, refer to Download Contentstack (SP) Metadata.
Configure Contentstack App in Microsoft Azure AD B2C
To configure the integration of Contentstack into Microsoft Azure AD B2C, you need to add the Contentstack app in the Microsoft Azure AD B2C portal.
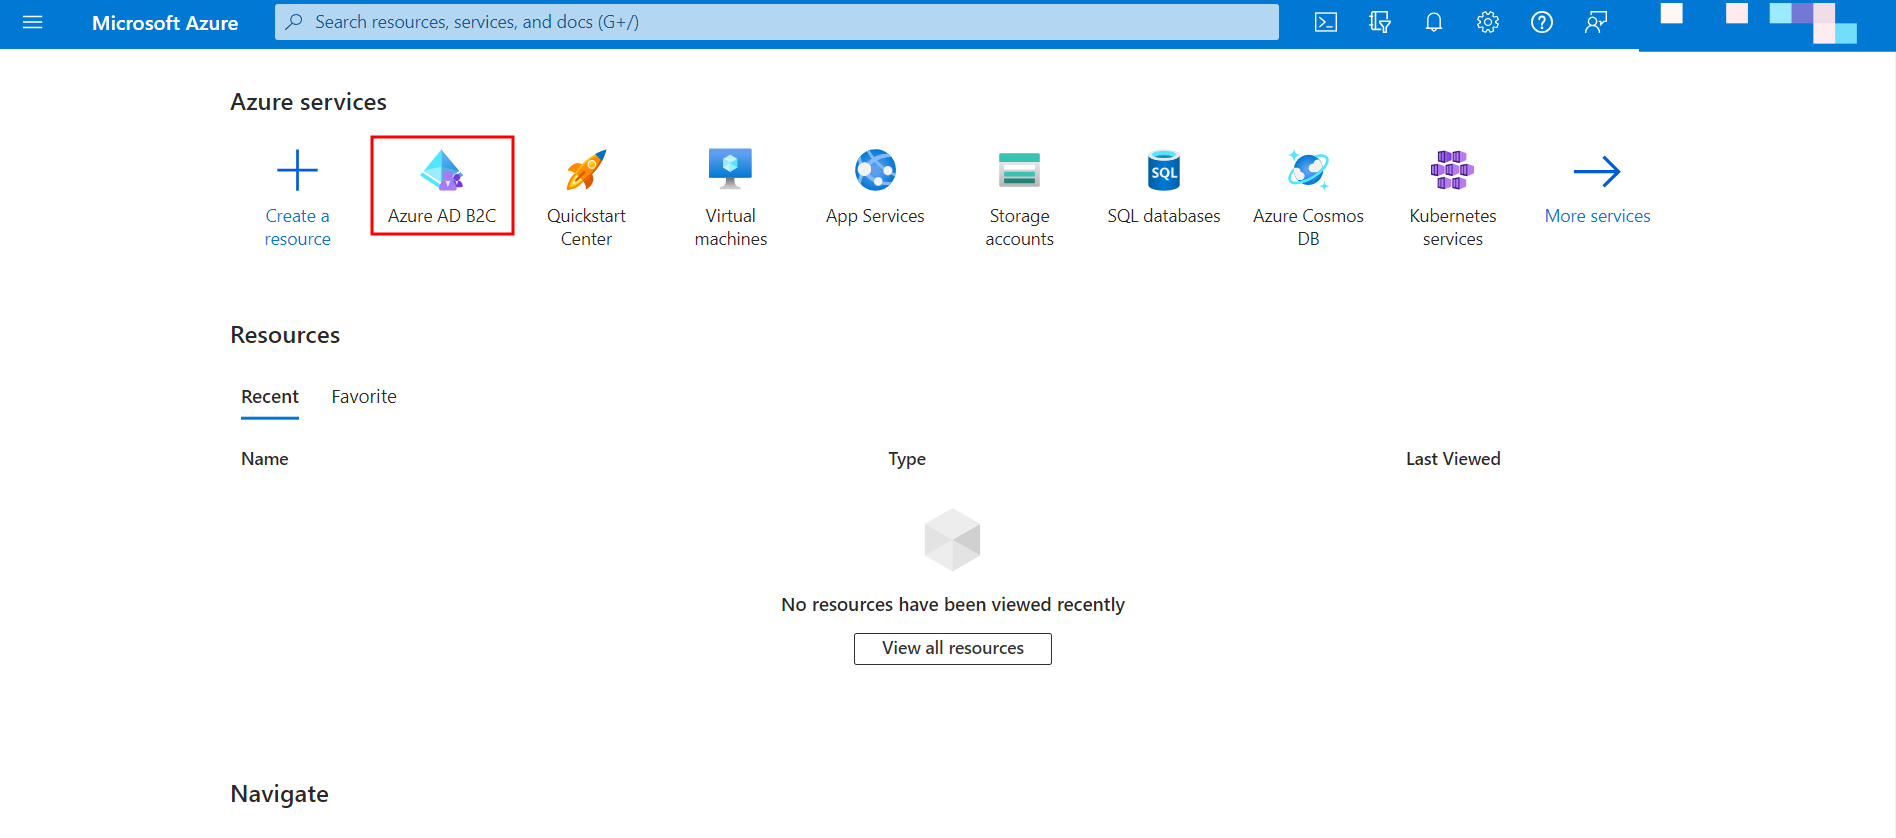
Go to the Microsoft Azure Portal, and click Azure AD B2C.
Note: Make sure you have an active subscription of Azure AD B2C before you proceed to the next step.
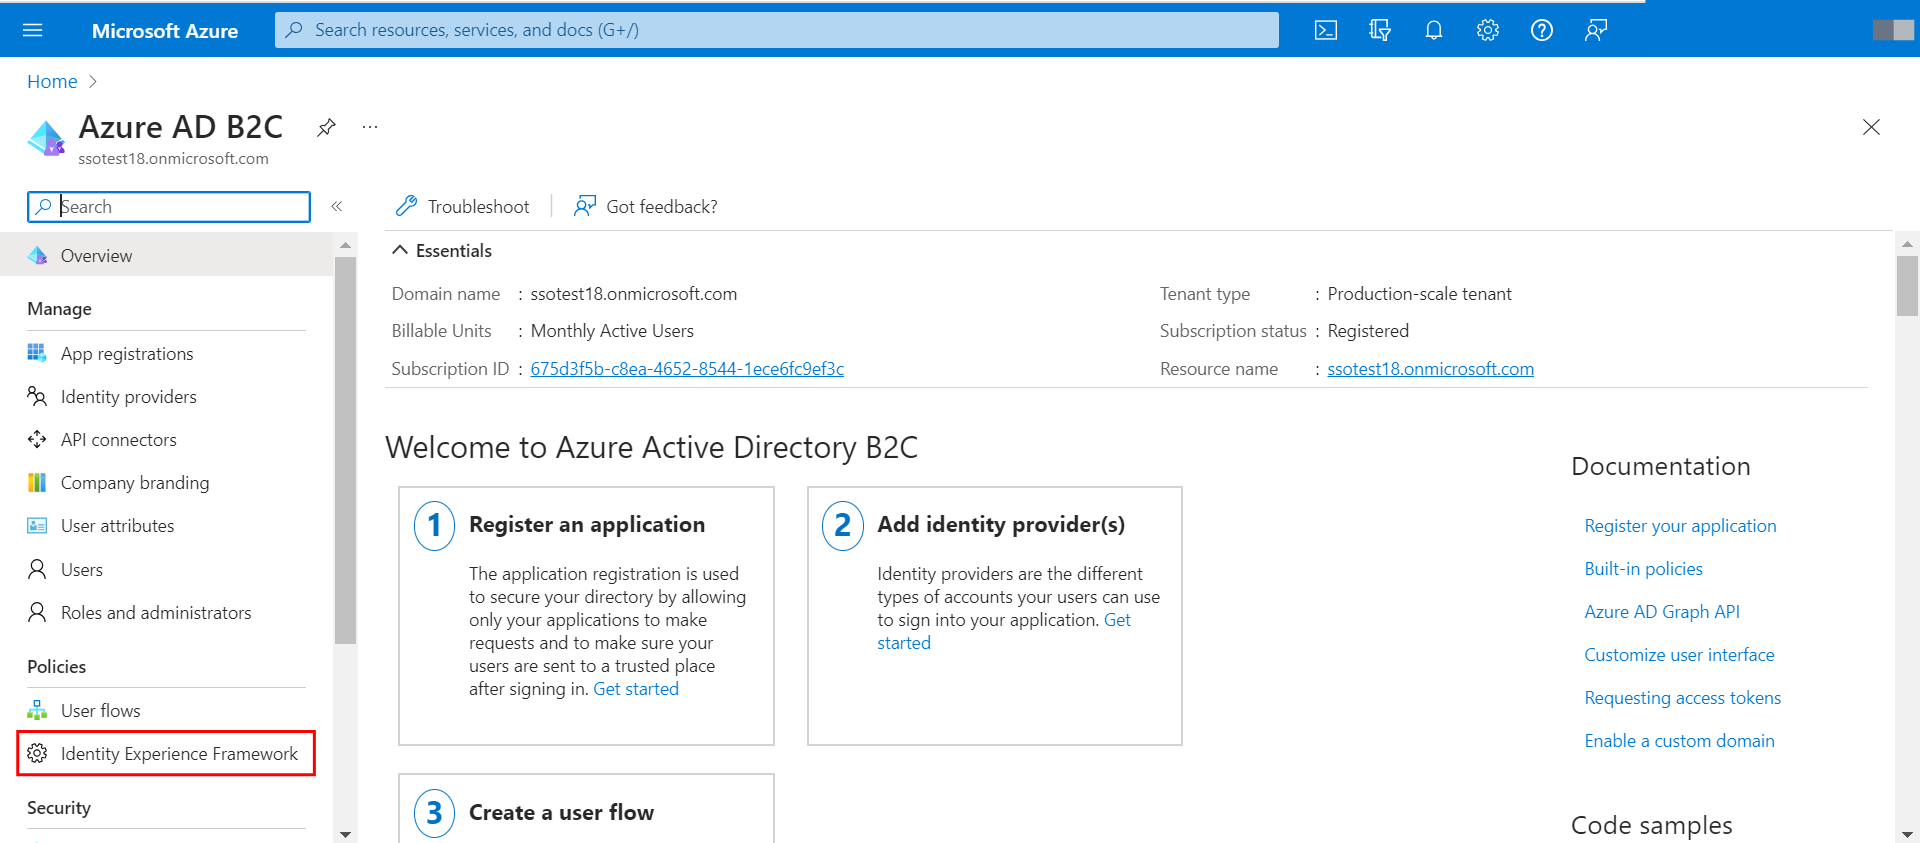
Within the Azure AD B2C portal, in the left navigation panel, scroll and click Identity Experience Framework.
Next, generate the required security certificate that you will need in the next step.
Additional Resource: For detailed instructions on generating the certificate, refer to the Obtain a Certificate documentation.
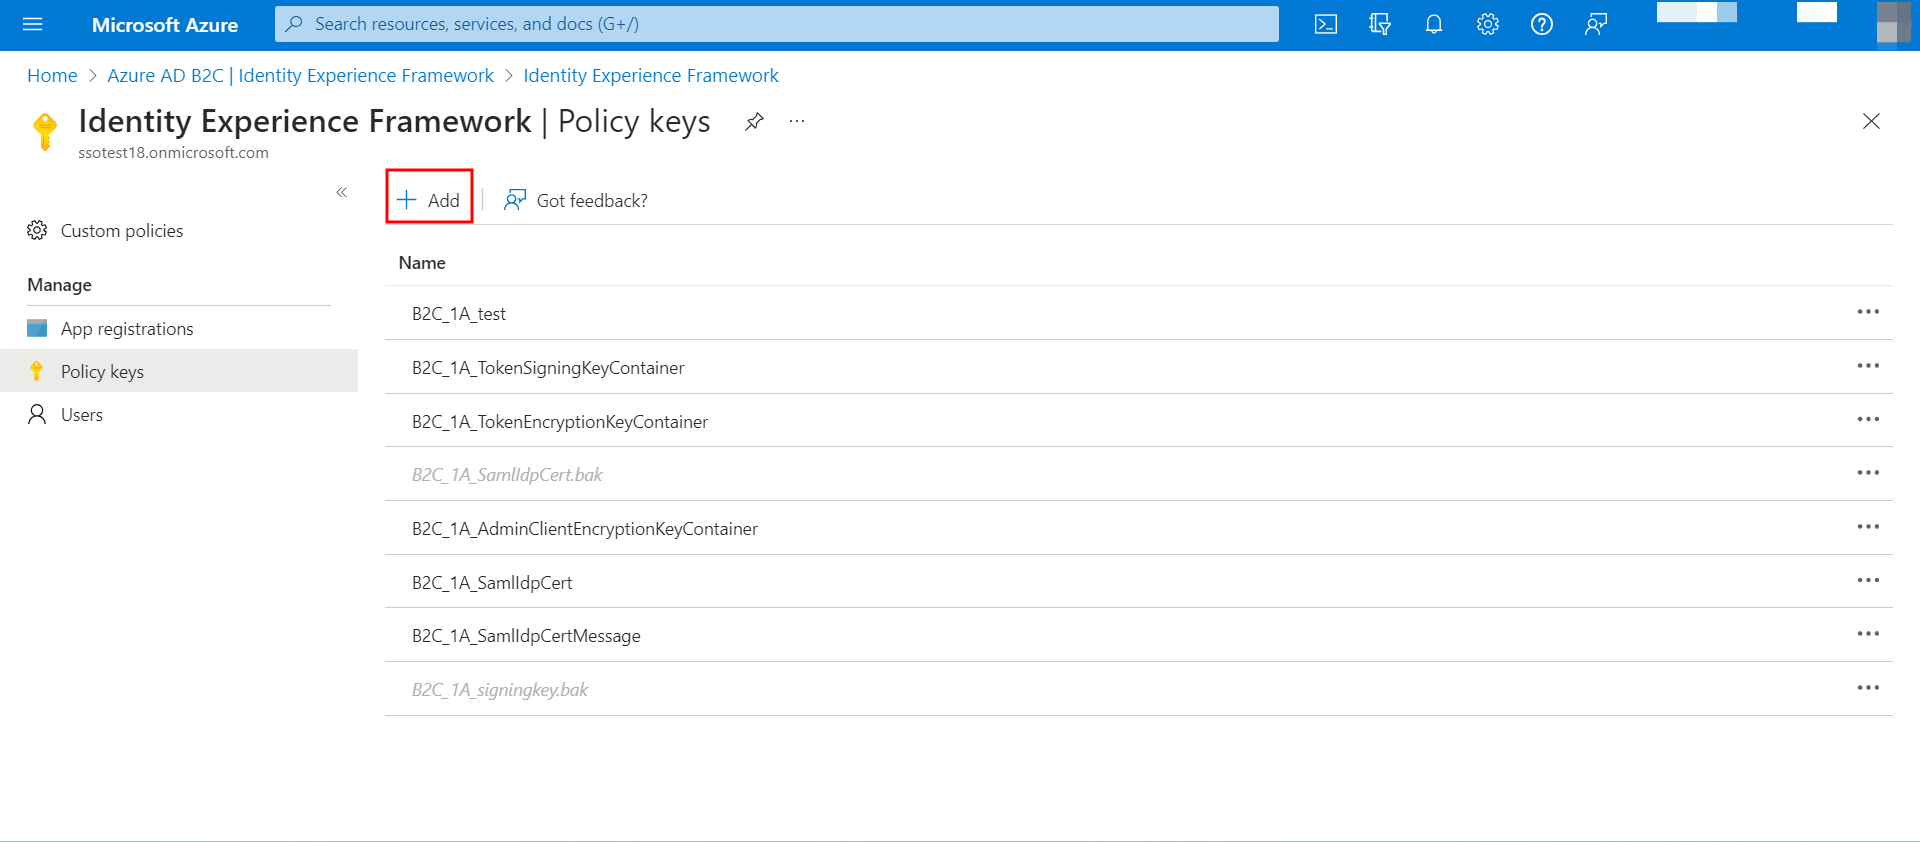
Next, create and upload the policy keys for your application. To do so, follow the steps given below:
- Navigate to the Policy keys section in your Azure AD B2C portal and click + Add.
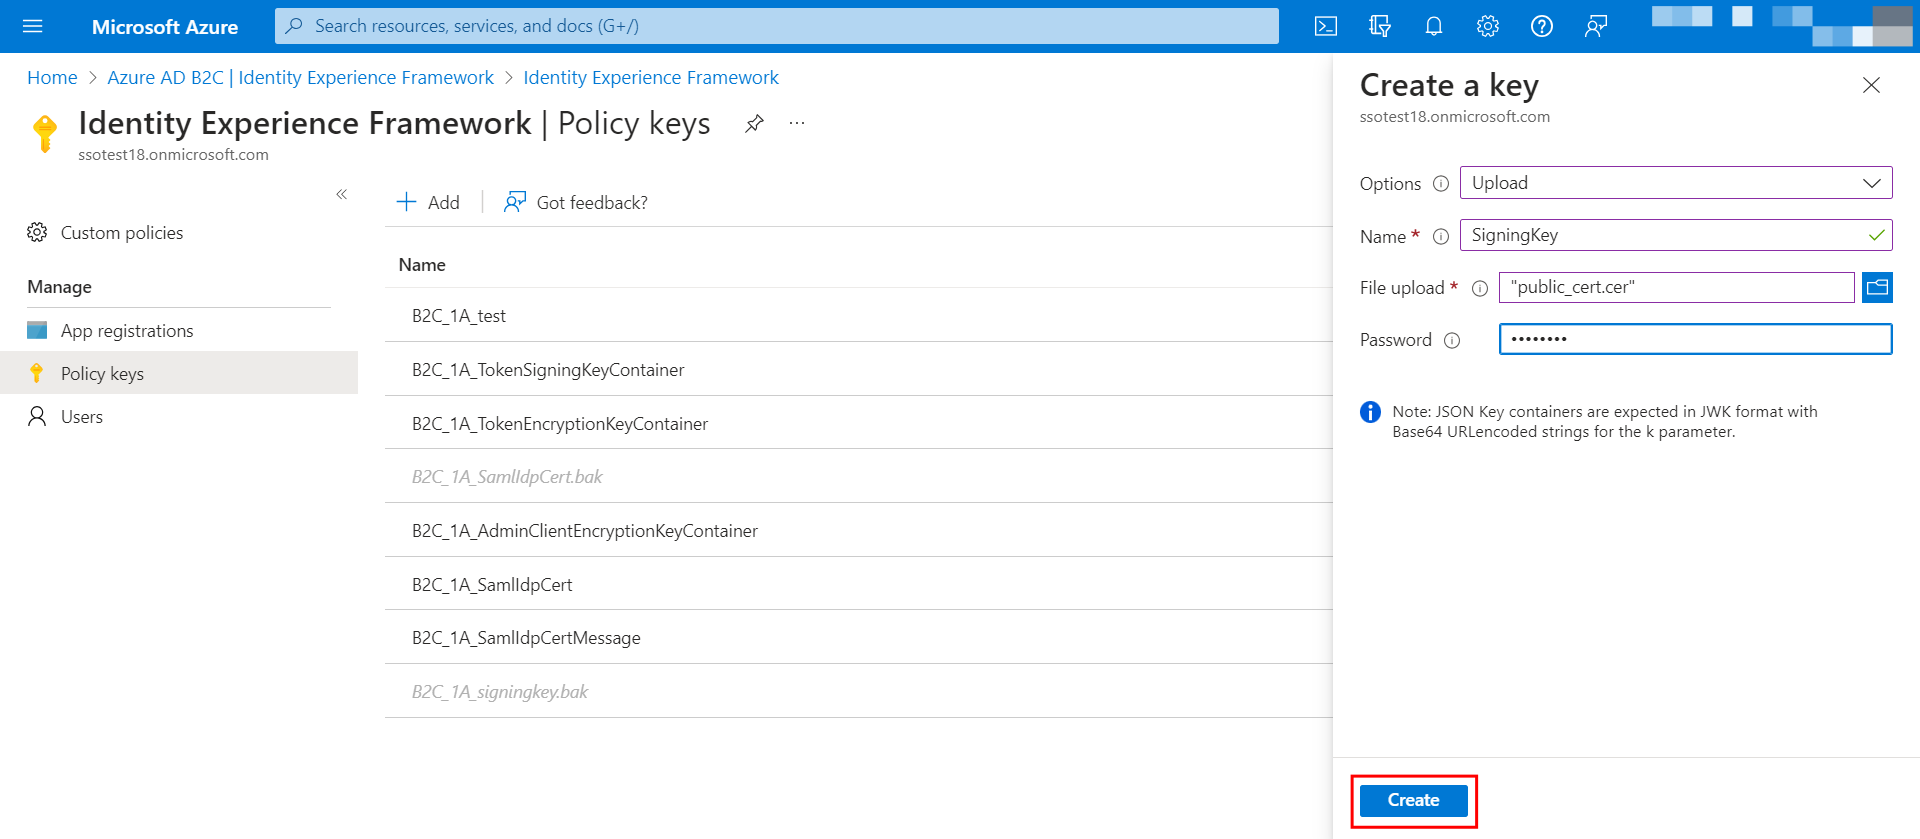
- Within the Create a key panel that appears, select Upload from the dropdown menu for the Options field.
- Enter the Name for the policy key.
- In the File upload field, browse your local machine and select the security certificate created in the previous step.
- Enter a Password and click Create.
Register the IdentityExperienceFramework and ProxyIdentityExperienceFramework applications in your portal.
Additional Resource: Refer to the Microsoft documentation on registering the IdentityExperienceFramework application and the ProxyIdentityExperienceFramework application for more information.
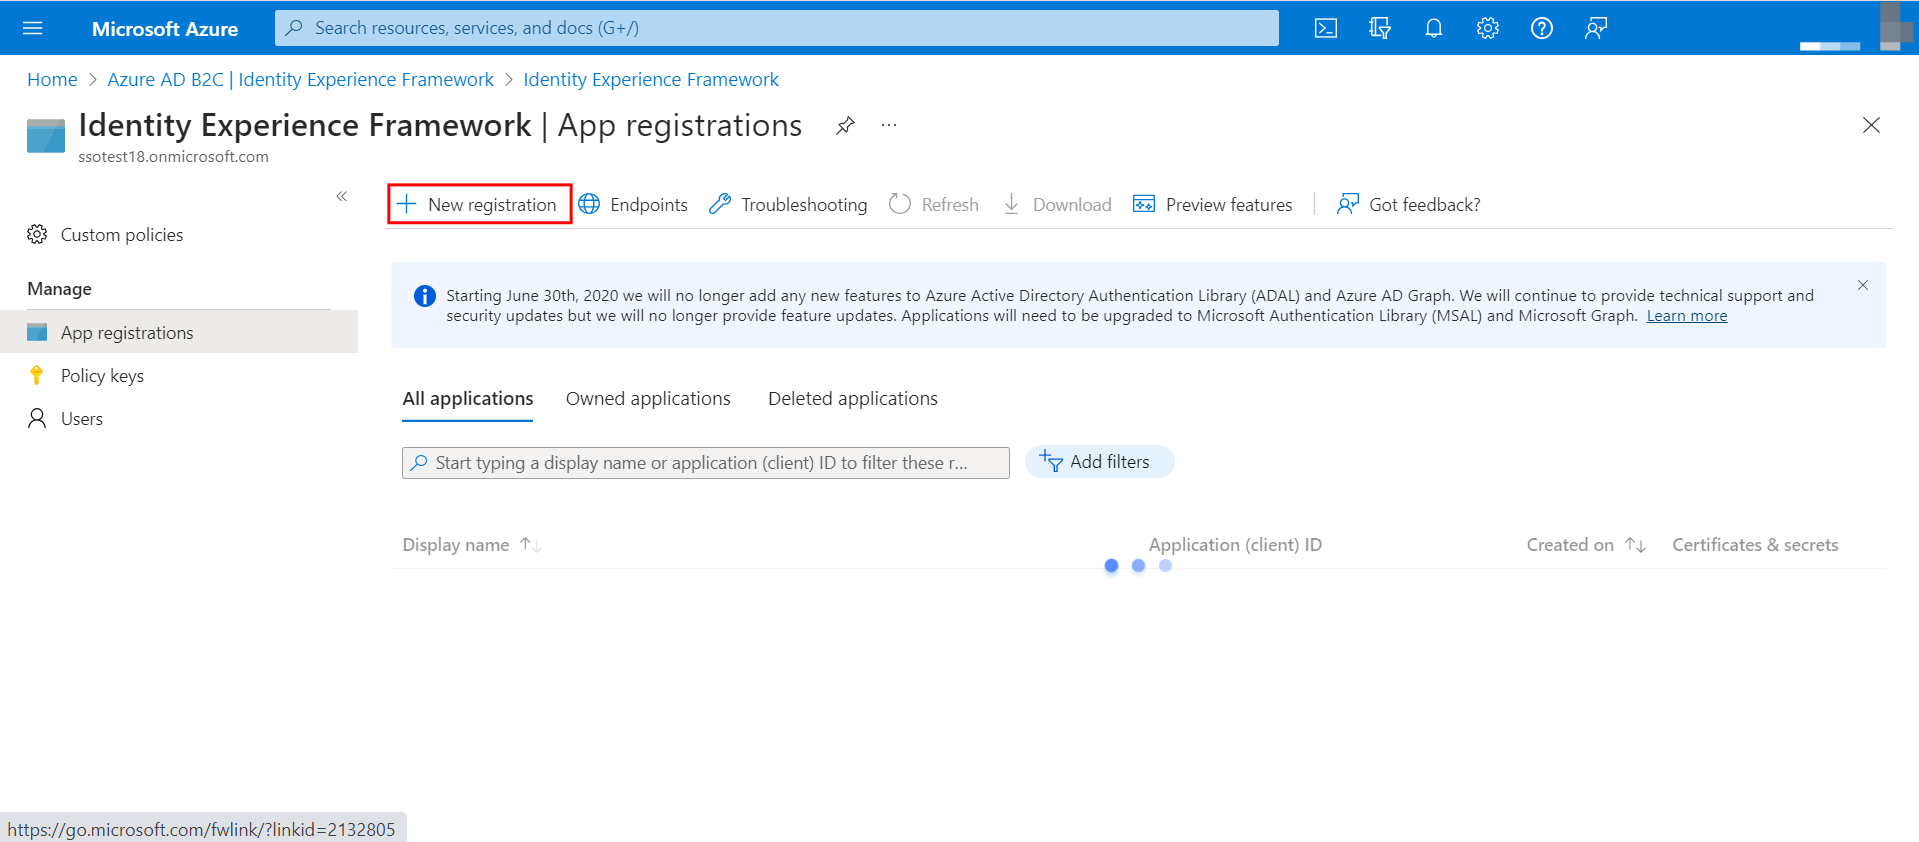
Register the Contentstack application in the Azure AD B2C portal as follows:
- Navigate to App registrations and click + New registration.
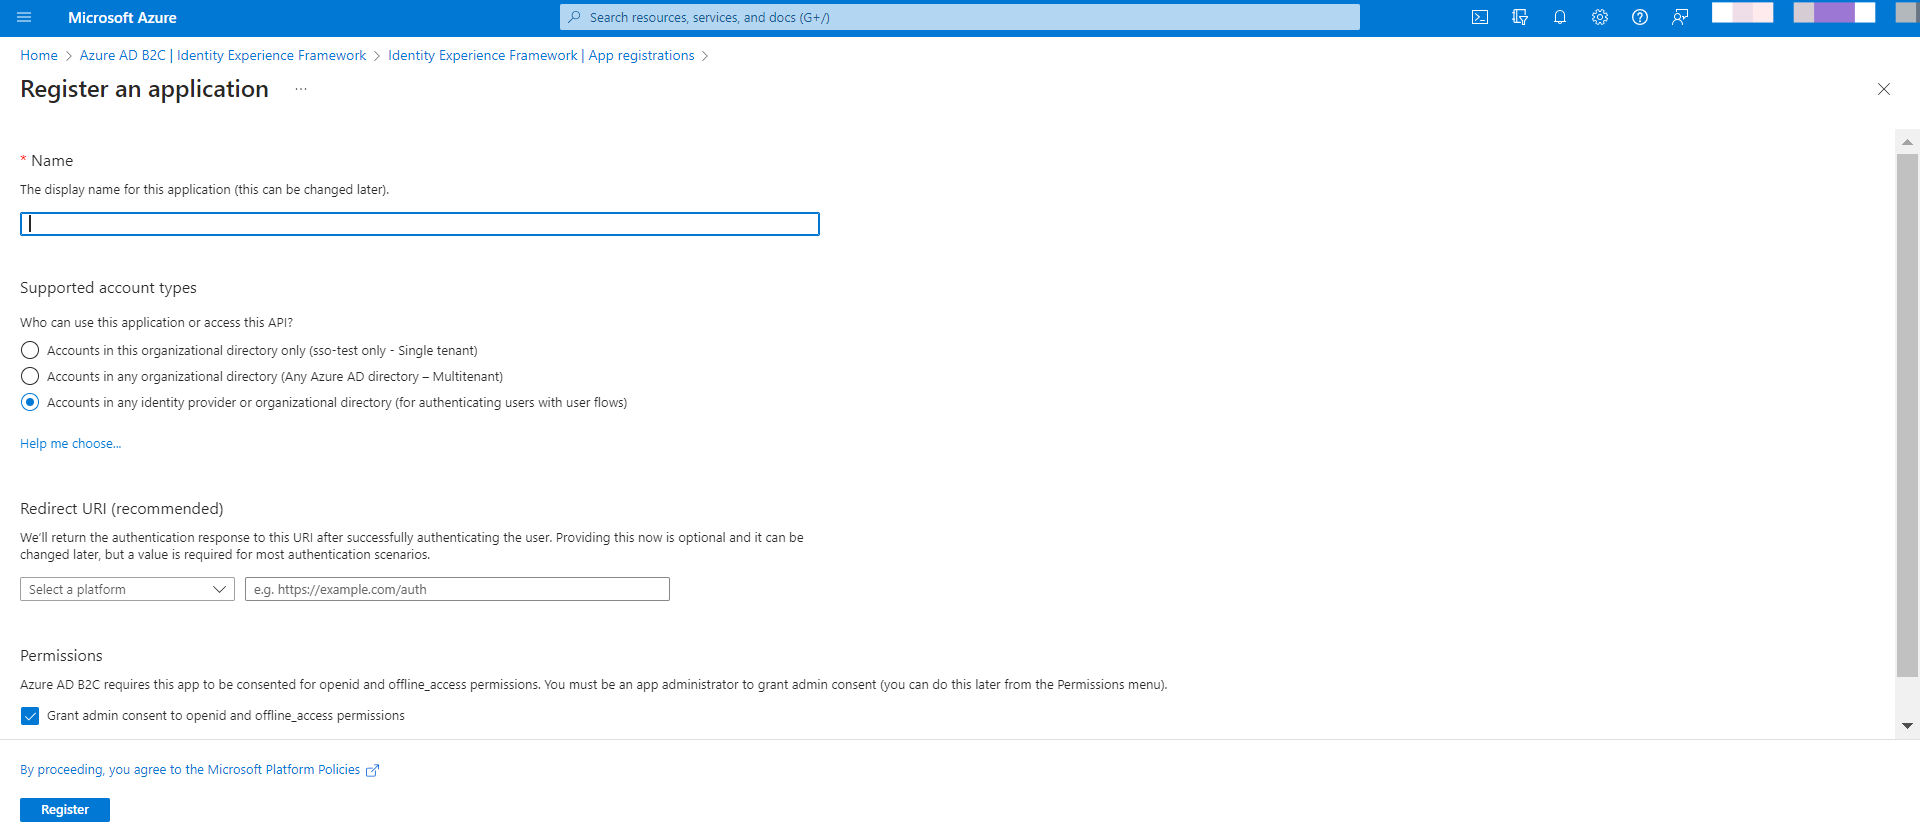
Enter the Name for your application.
Tip: In an organization with more than one connection, name each Azure AD B2C application after the Contentstack connection it serves, for example "Contentstack (Acme External Contributors)."
Select any one of the Supported account types from the given options.
- In the Redirect URI section, select Web as the platform from the dropdown and add the ACS URL you obtained in Step 1.3.
Select the checkbox under Permissions and click Register.
Note: Copy the Application ID for later use in the custom policies.
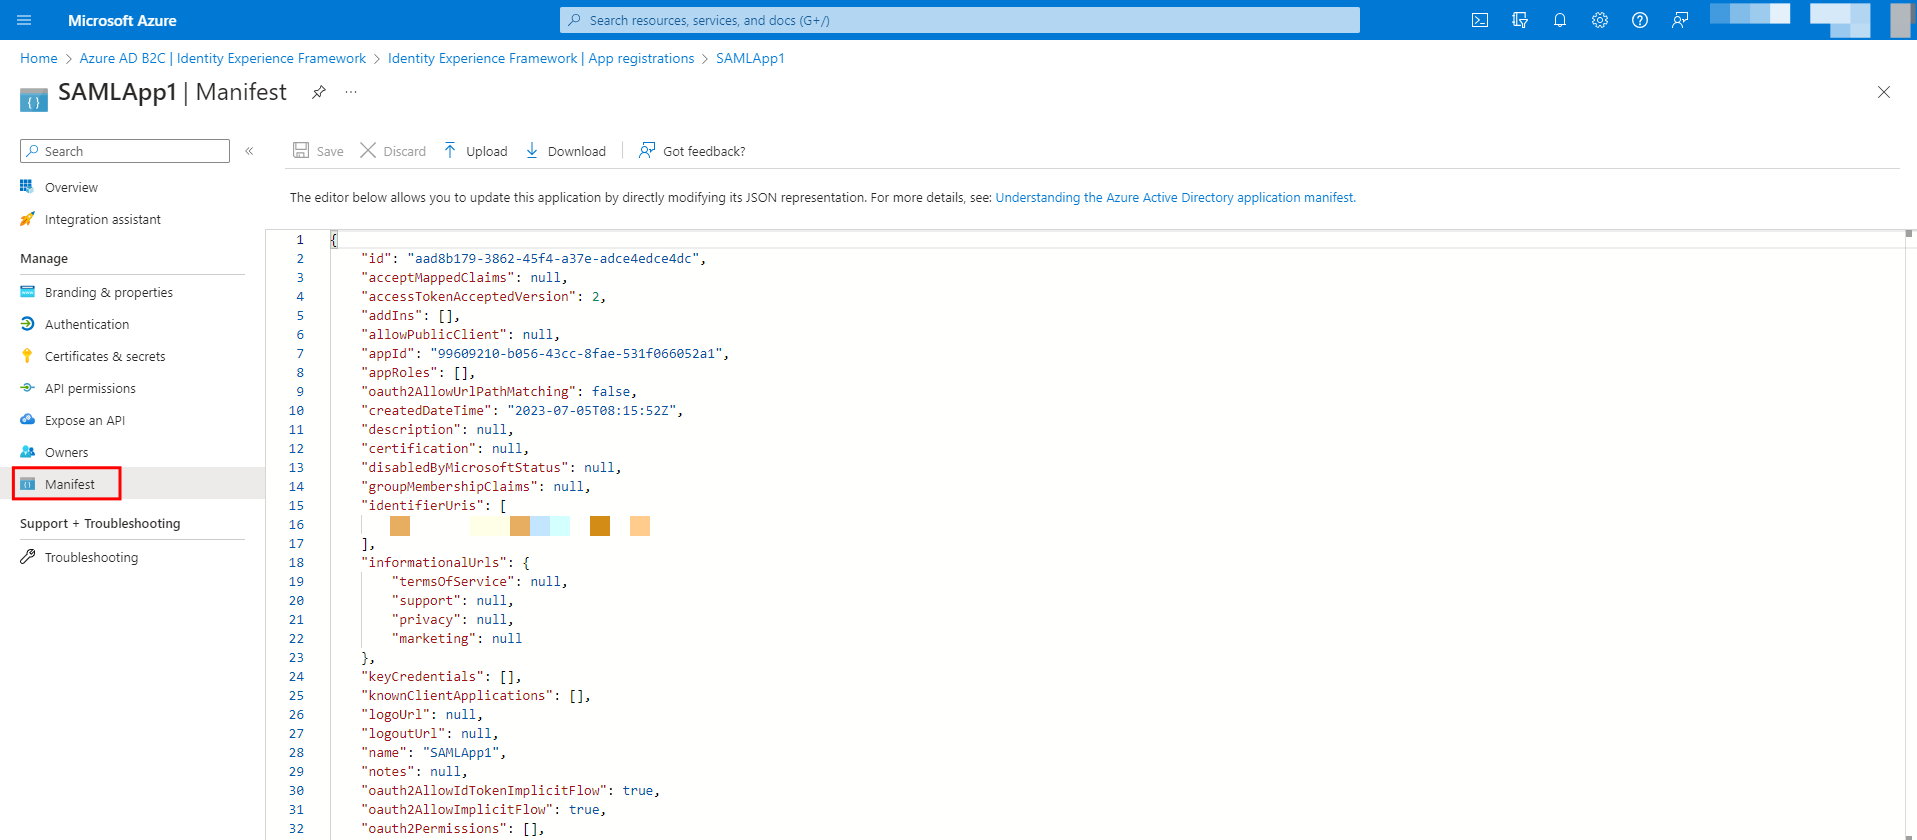
To configure your application, go to the Manifest tab in the left navigation panel. In the IdentifierUris field, enter the EntityId that you received in Step 1.3. Click Save to secure your changes.
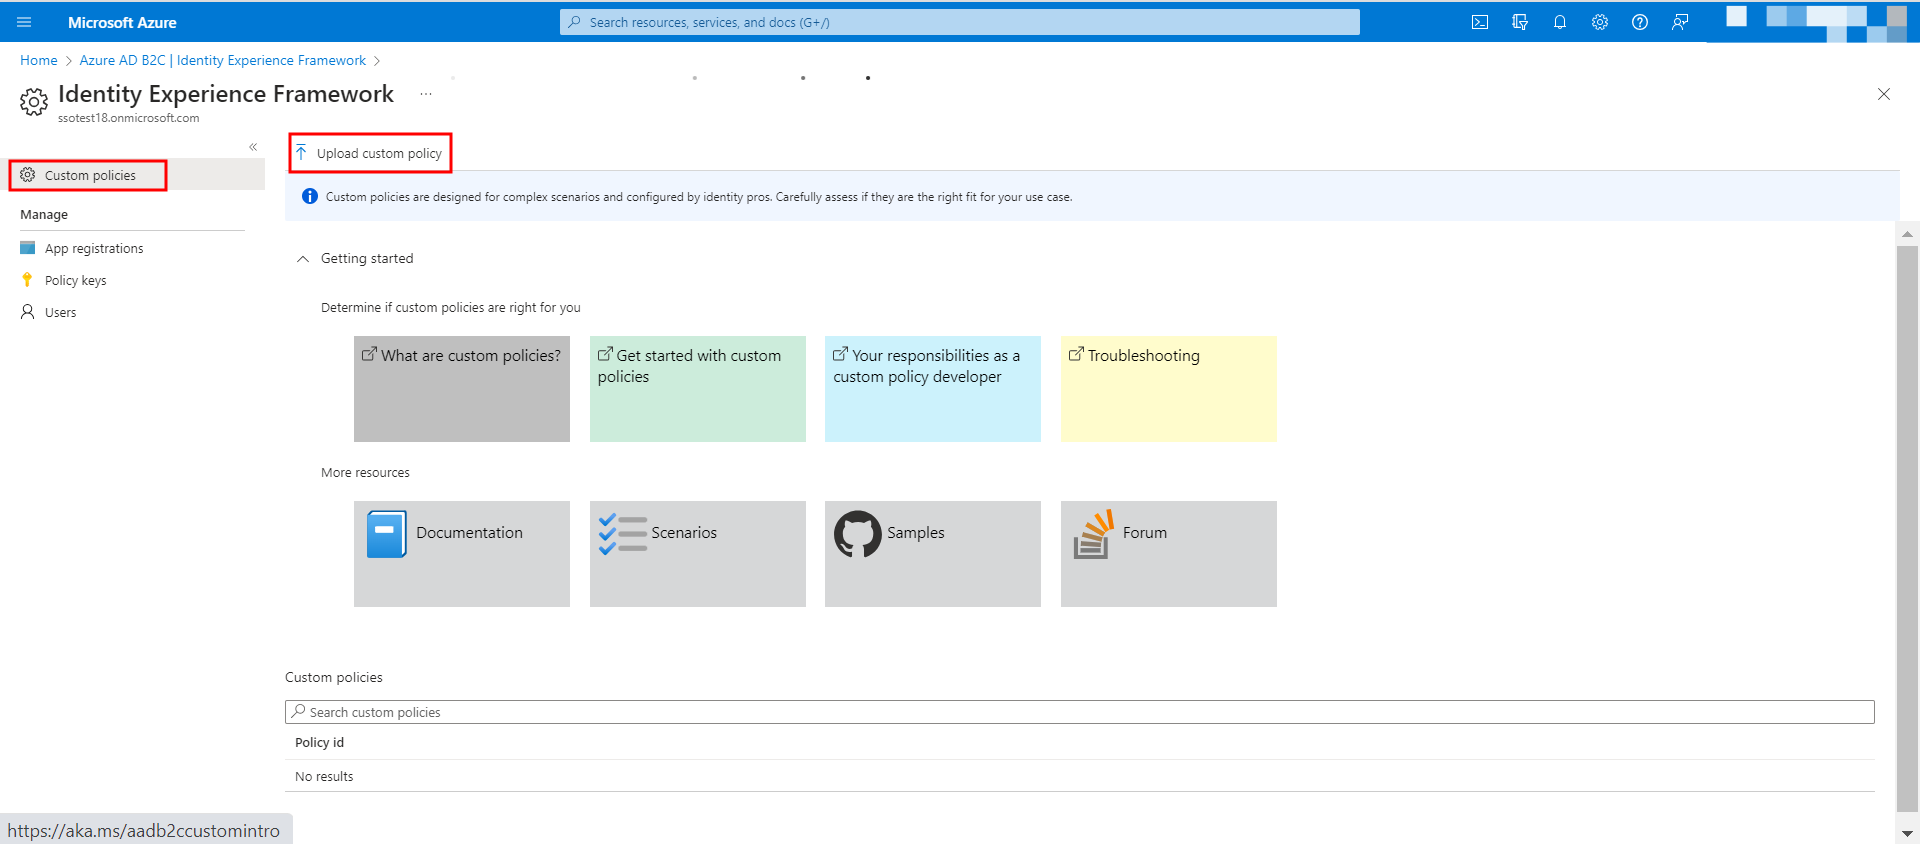
Within the Identity Experience Framework, navigate to the Custom policies tab and click Upload custom policy.
If you already have custom policies defined for your B2C application, you can use the same ones, and ensure the SAML2 assertion is configured. If not, you can use the custom policy starter pack and follow the SAML assertion configurations.
In the custom policy document, ensure the following output claims are added to the Technical profile section.
<OutputClaim ClaimTypeReferenceId="givenName" PartnerClaimType="first_name" /><OutputClaim ClaimTypeReferenceId="surname" PartnerClaimType="last_name" /><OutputClaim ClaimTypeReferenceId="signInNames.emailAddress" PartnerClaimType="email" />
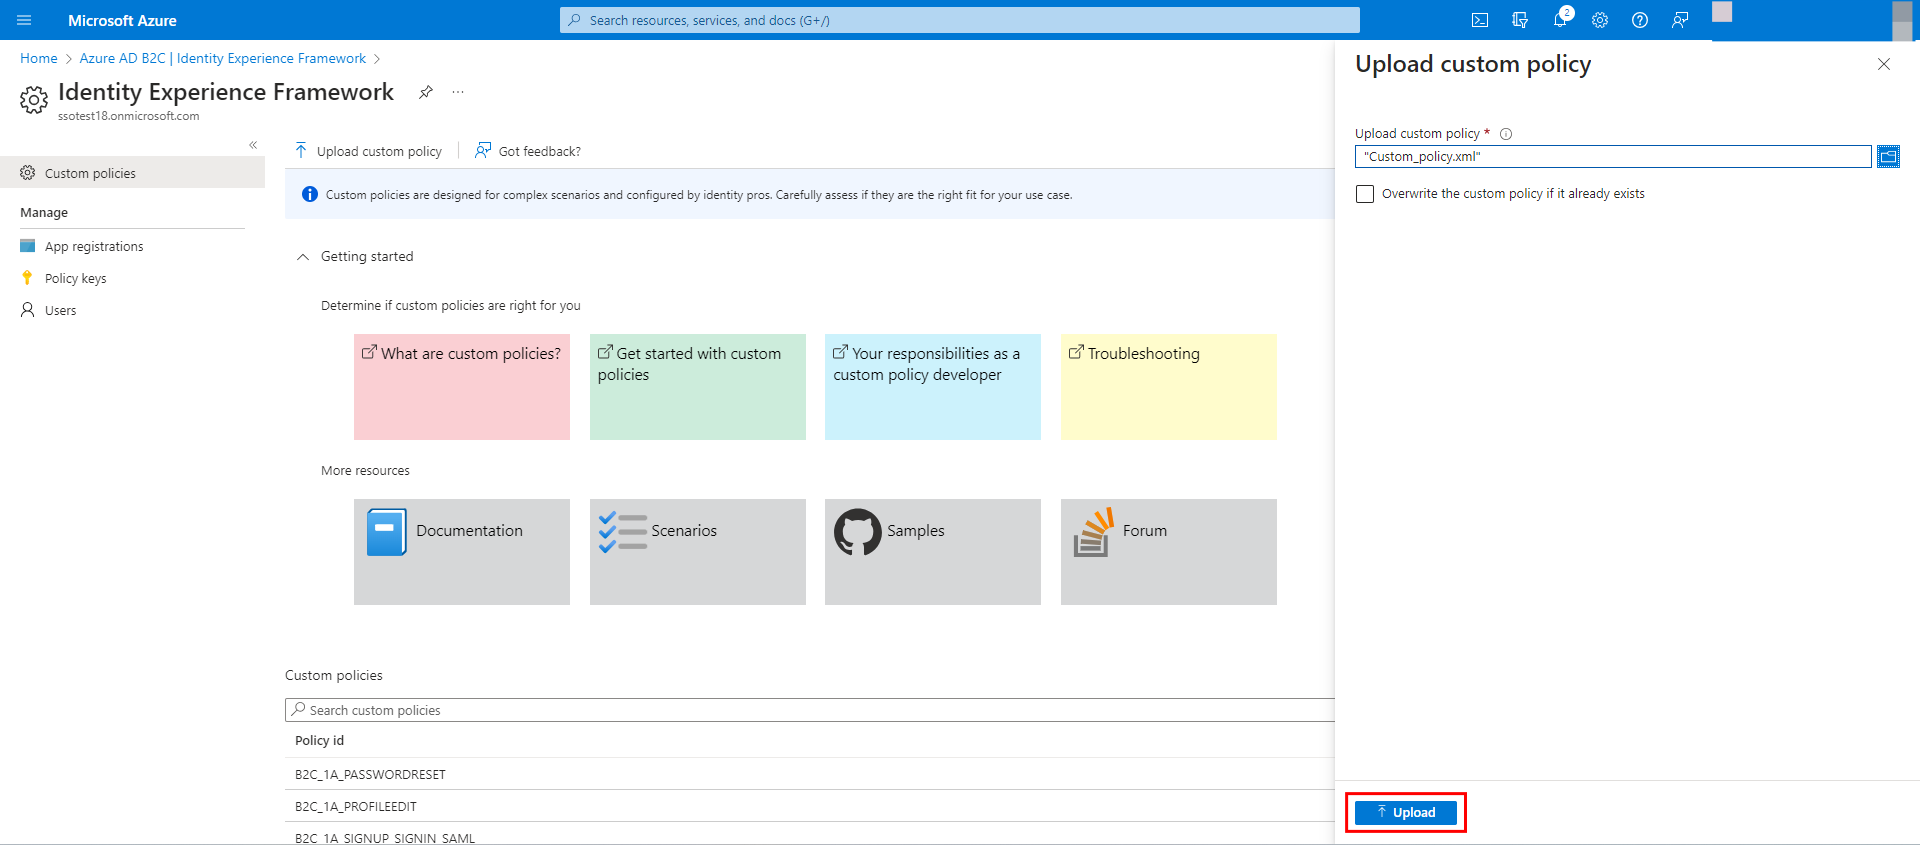
Browse your local machine, select the file that includes the updated custom policy, and click Upload.
Once the setup is done, navigate to the URL https://<tenant-name>.b2clogin.com/<tenant-name>.onmicrosoft.com/<policy-name>/Samlp/metadata, where <tenant-name> is your Azure B2C tenant name. This should give you a valid SAML metadata response.
Search for SingleSignOnService on the page and note the URL mentioned under the Location parameter. Save the metadata page as an XML file if you plan to import it into Contentstack.
Configure Microsoft Azure AD B2C Details in Contentstack
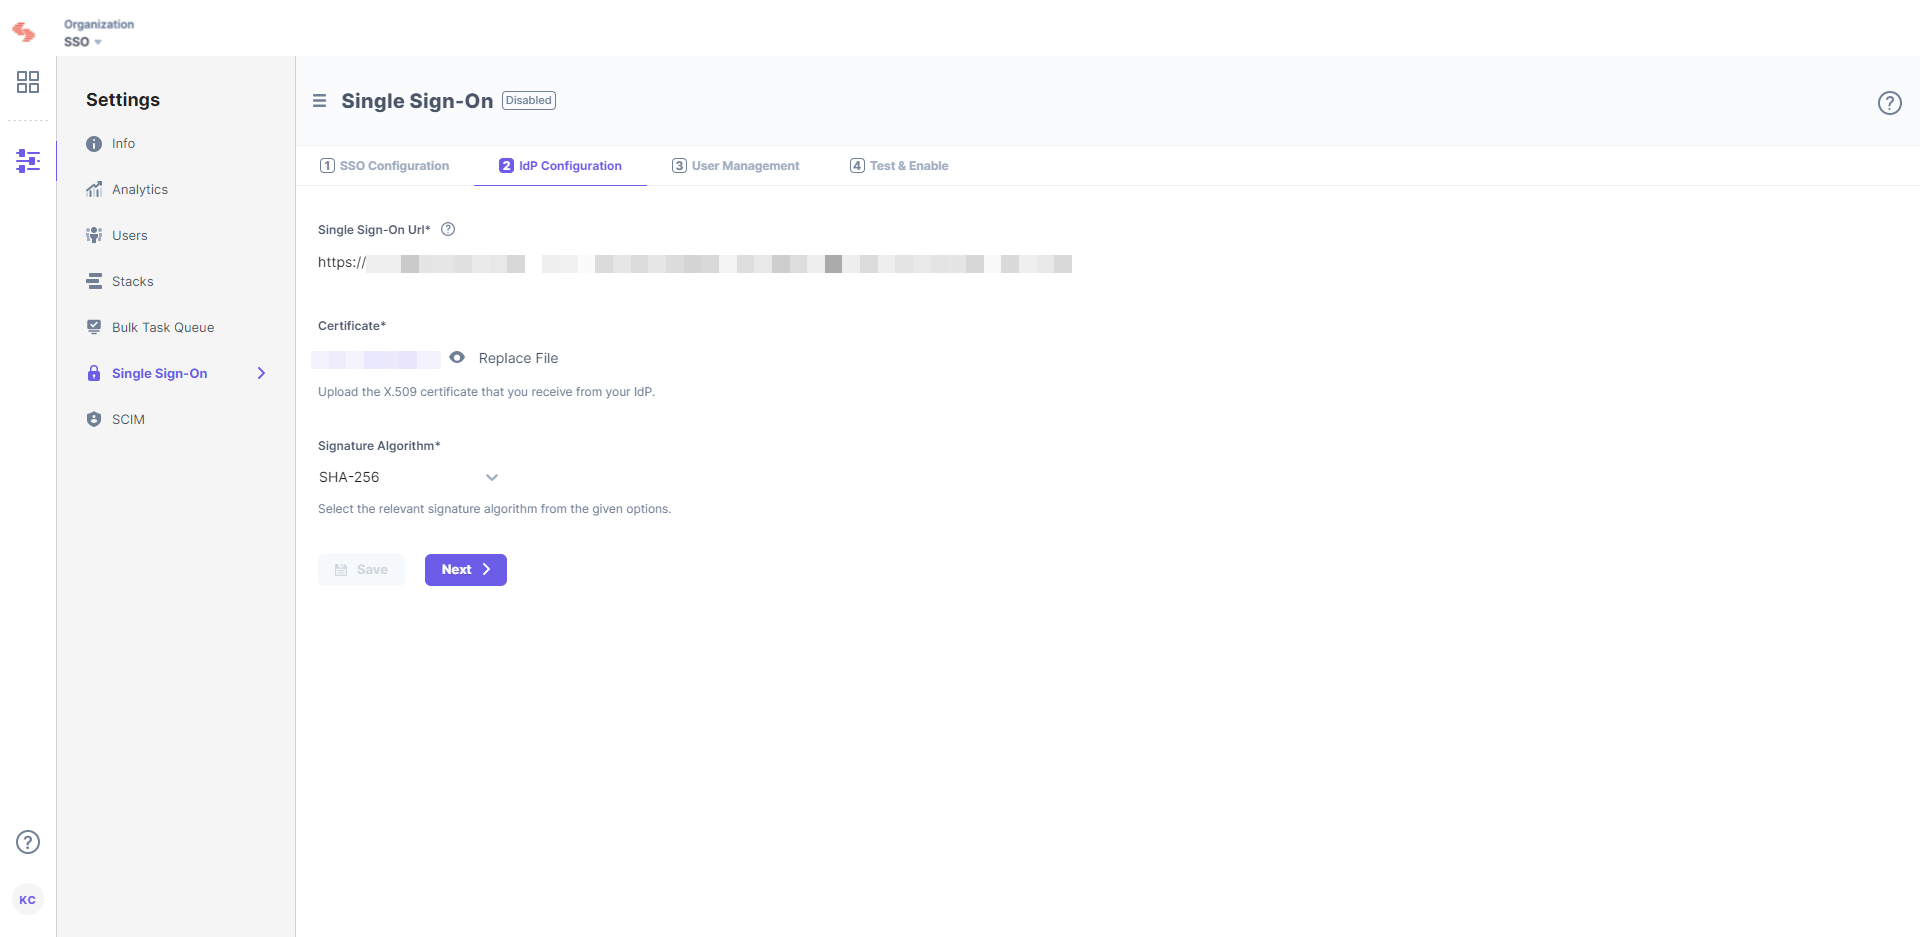
Go to 2. IdP Configuration for this connection in Contentstack. You can provide Azure AD B2C's details in one of three ways:
- Metadata URL: Enter the SAML metadata URL from Step 2.9 and click Fetch. Contentstack retrieves and parses the details.
- Metadata XML: Upload the metadata file you saved from that URL. Use this when network rules prevent the browser from reaching the metadata endpoint.
- Manual entry: Enter the single sign-on URL and certificate by hand, as described below.
Tip: Importing metadata auto-populates the Single Sign-On URL, certificate, and related fields, which reduces manual entry and errors. Signature algorithm and SAML encryption are not part of IdP metadata, so you always set those by hand. For the full procedure and error handling, refer to Import IdP Metadata.
To enter the details manually:
Paste the URL from Step 2.10 into the Single Sign-On URL field.
In the Certificate field, upload the certificate generated in Step 2.
Warning: A connection stores one signing certificate. Contentstack shows its expiry date next to the field. When your IdP switches to a new signing certificate, every SAML assertion arrives signed by a certificate Contentstack does not recognize, and sign-in through this connection fails until you upload the new certificate here. Coordinate the replacement with the switch on the IdP side rather than waiting for the current certificate to expire.
Under Signature Algorithm, select the algorithm your policy uses. Available options are SHA-1, SHA-256, and SHA-512.
**Note**: The **Single Sign-On URL** must use HTTPS.(Optional) Turn on SAML encryption to encrypt your SAML attributes. SAML encryption is configured per connection.
Click Save.
Note: The organization owner can always sign in with Contentstack credentials, regardless of SSO status. If SSO login fails after a certificate update, the owner can sign back in and restore the previous configuration.
Add Users to Your Microsoft Azure AD B2C Application
After setting the necessary configurations in Contentstack, you can add users to your newly added application. You can add users in two ways:
- Through the sign-up page, if configured
- Through the users list on the application
Here, we are using the second method to add users.
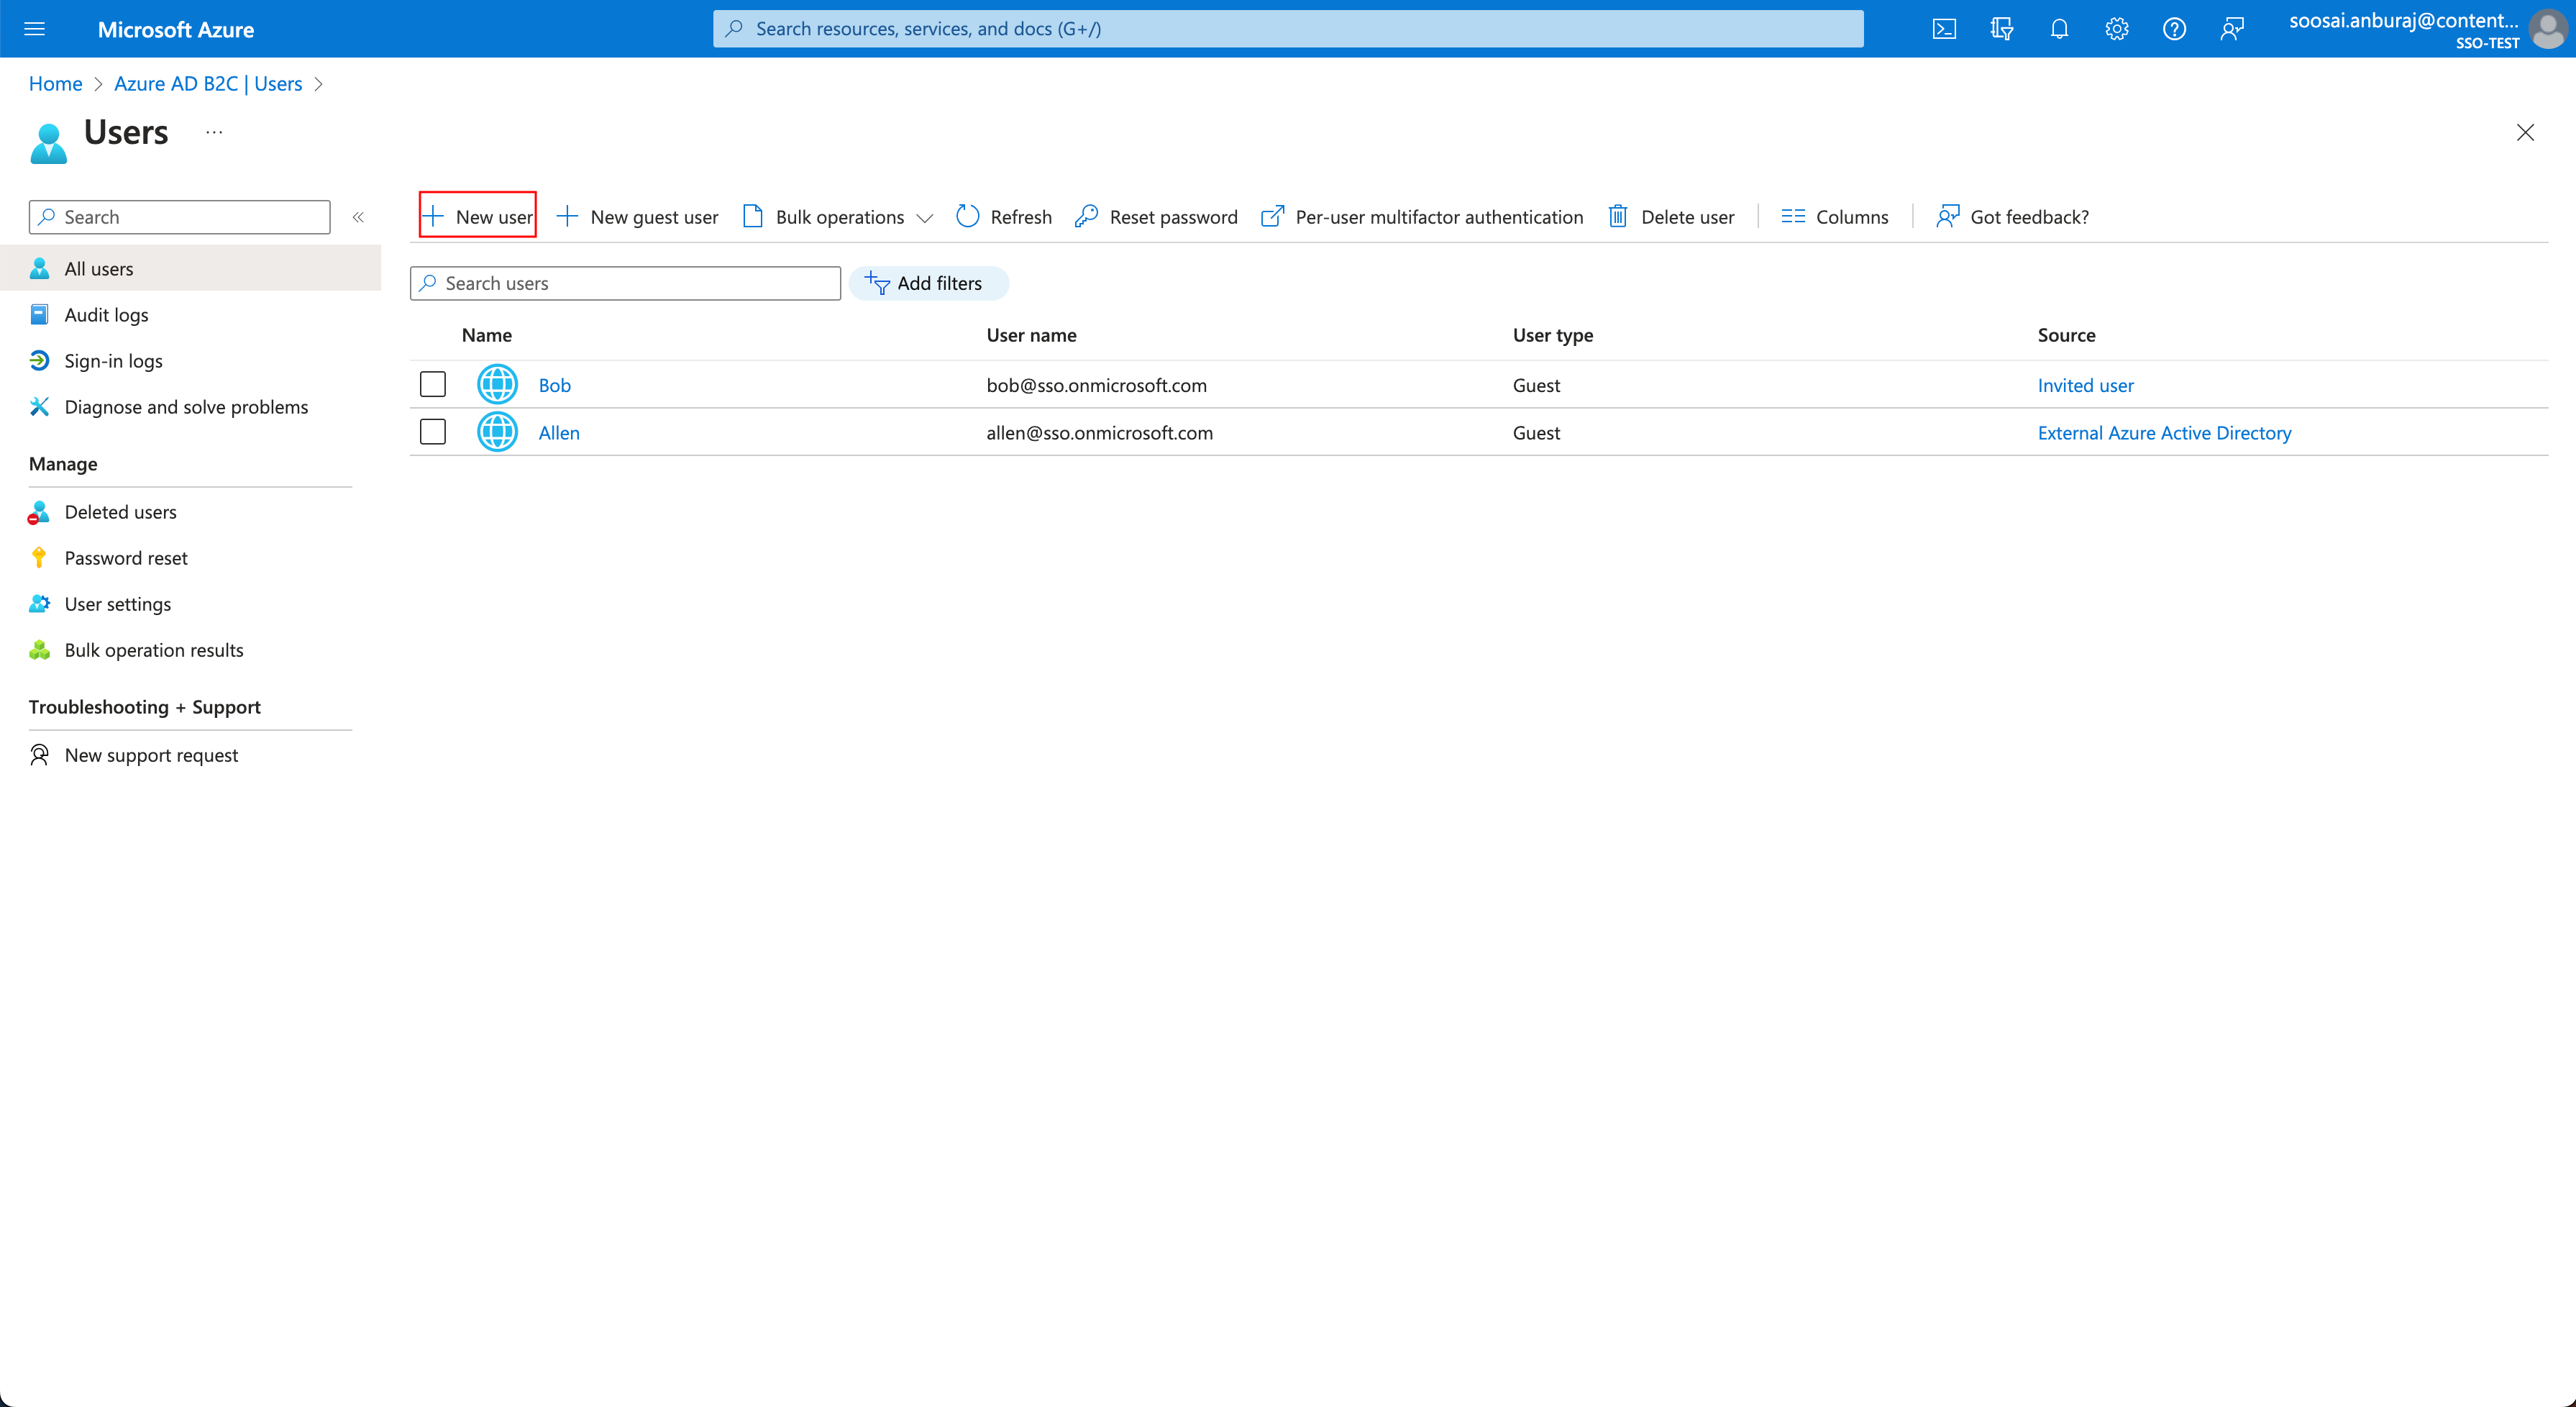
- Within the Microsoft Azure AD B2C portal, click Users in the left navigation panel.
- Click + New Users.
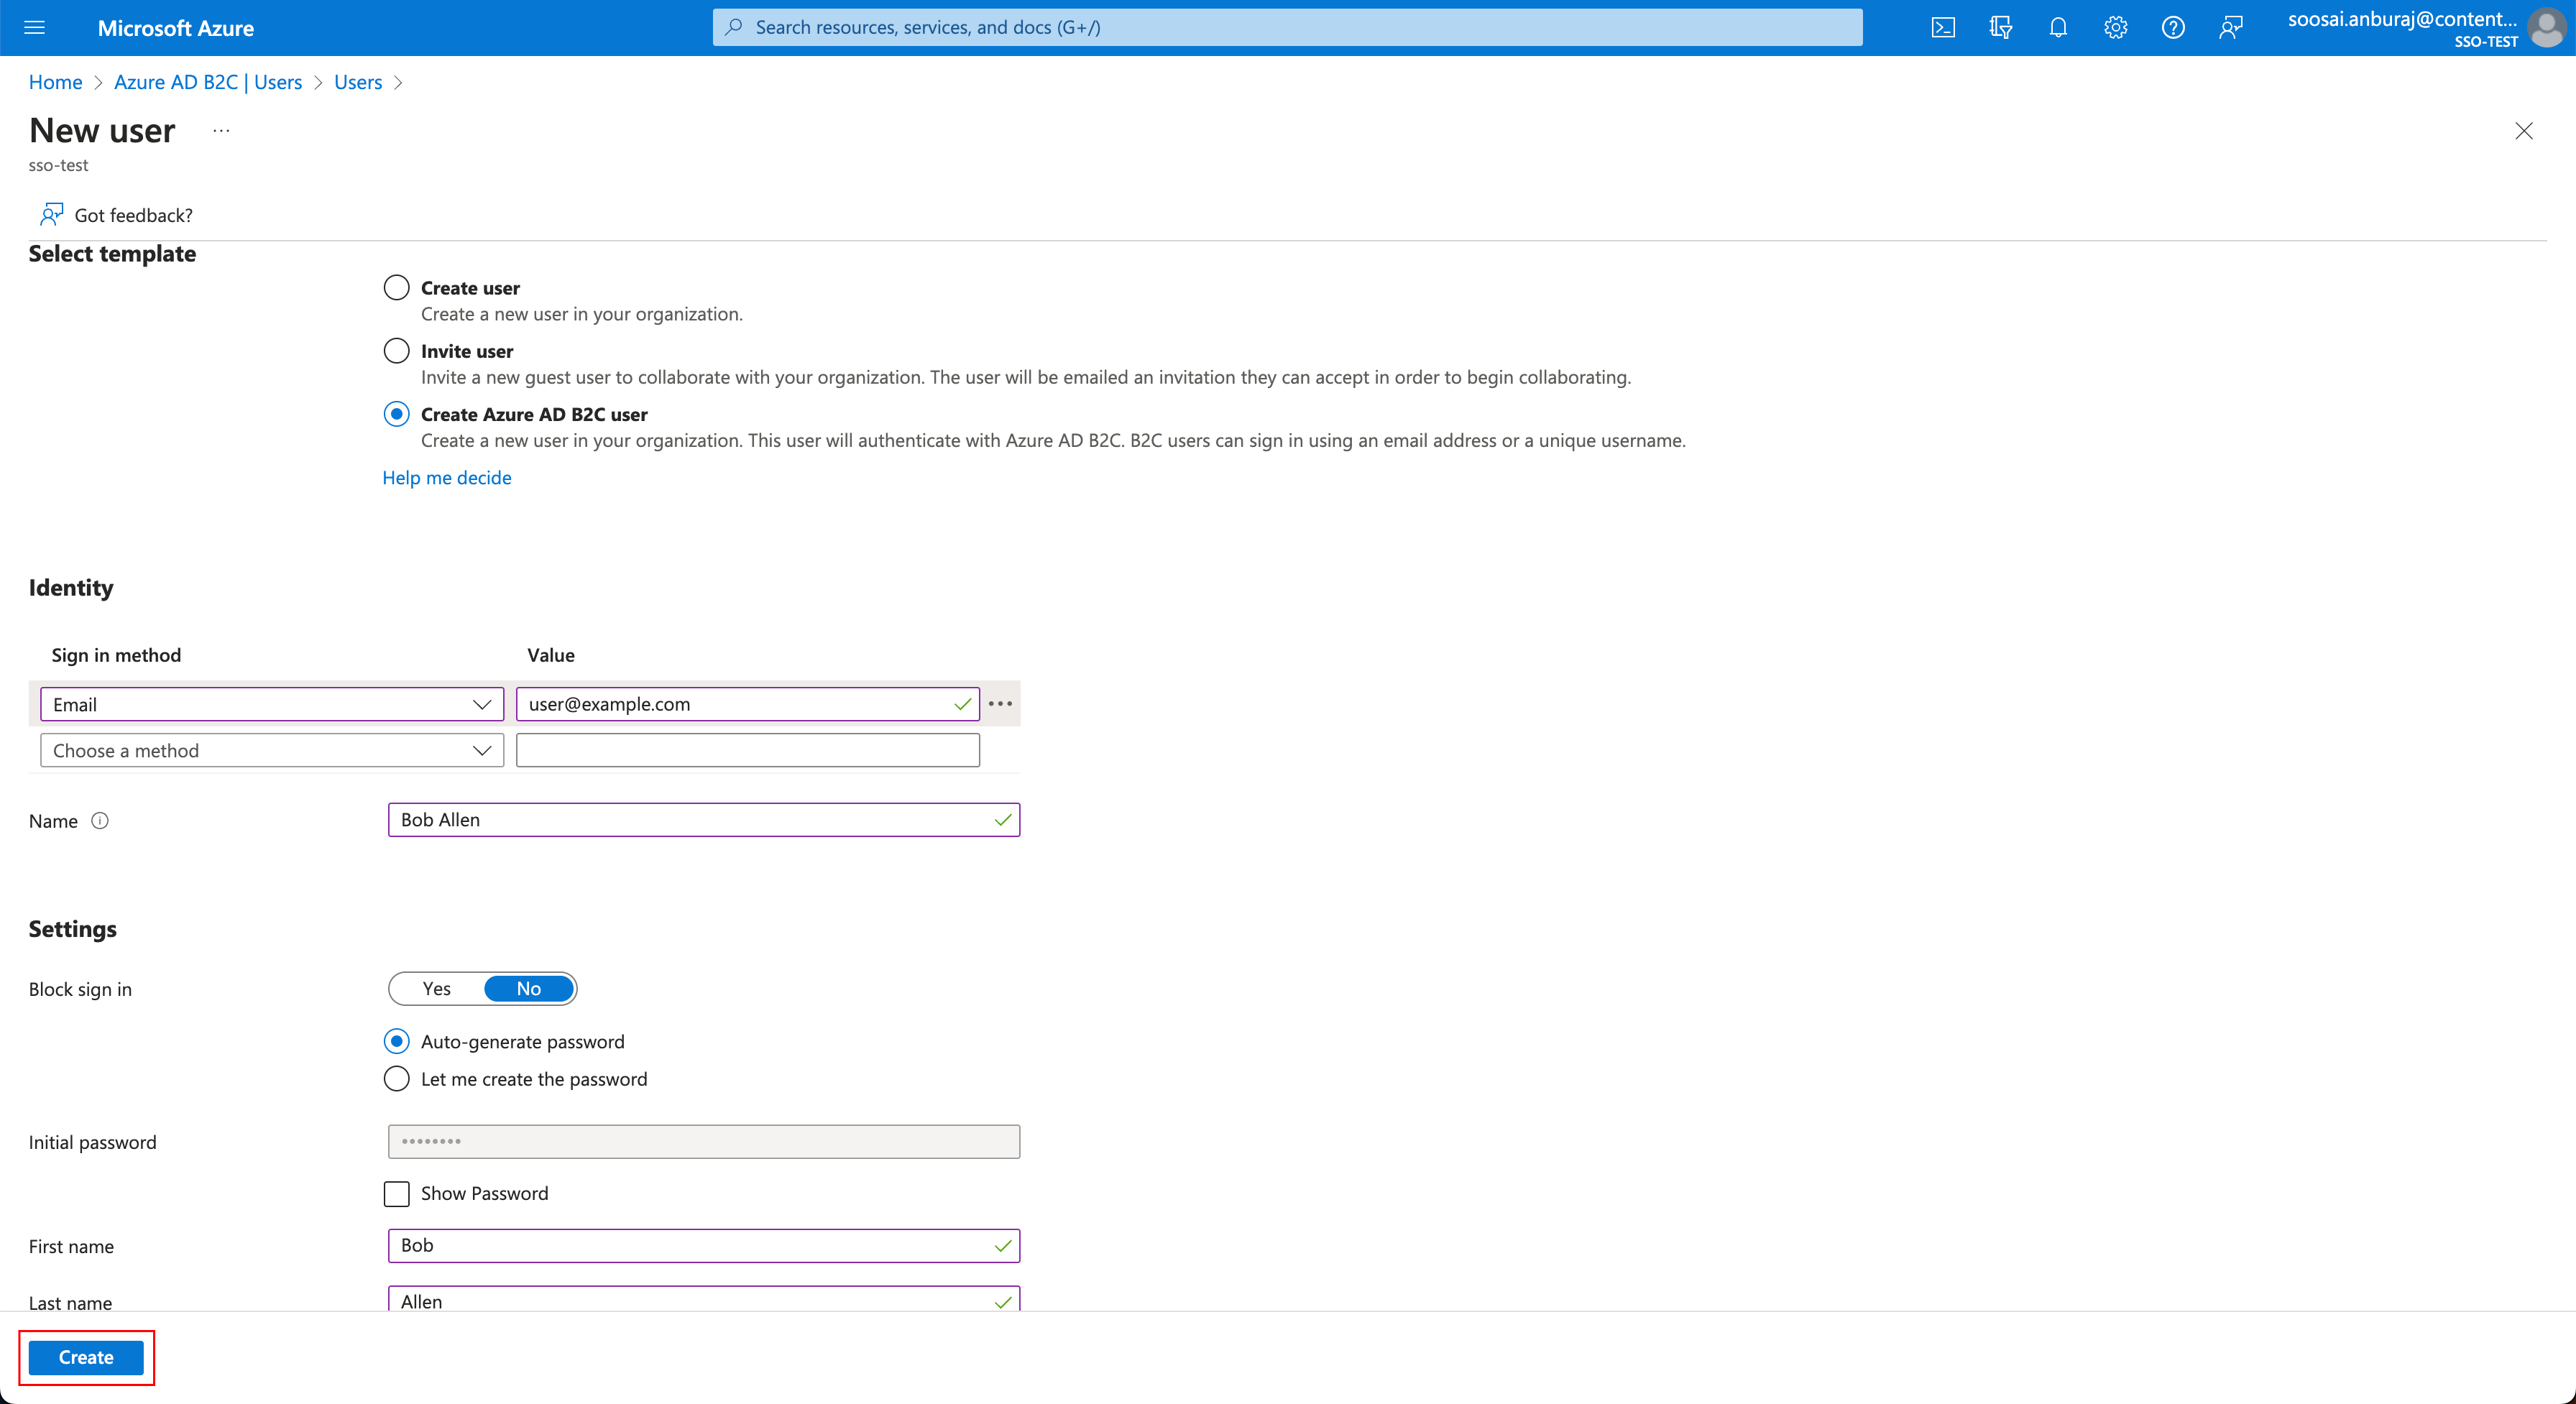
- In Select template, choose one of the options provided. You can either Invite user, Create user, or Create Azure AD B2C user.
- In the Identity field, provide the required data and click Create.
Note: Add only the users who authenticate through this connection. In an organization with more than one connection, a user is identified by email address across every IdP, and the same email cannot map to different users in different IdPs.
Manage Users, Test, and Enable SSO
User Management
In Contentstack, go to 3. User Management for this connection.
- Strict Mode: Enable Strict Mode if you do not want any user to access the organization without SSO login.
Note: Strict mode is set per connection, but it takes effect across the whole organization. If any enabled connection has strict mode on, the entire organization is SSO-only. Because of this, only one connection can hold the strict mode toggle at a time, and enabling strict mode on one connection disables the toggle on the others. Disabling a connection that has strict mode on removes strict mode for the organization, because a disabled connection does not contribute to the organization's strict state.
- User Email Whitelists: Lets specified users access APIs even when strict mode is enabled. This setting is organization-scoped and applies only when strict mode is enabled, so the field appears only under the User Management step of the connection that has strict mode enabled. Enter up to 100 email addresses separated by commas, for example, user1@example.com, user2@example.com. Each address must belong to an accepted, non-owner member of the organization.
Note: This is a plan-based feature. For access, contact our support team.
- Session Time-Out: Session Time-Out lets you define the session duration for a user signed in through this connection. The default is 12 hours, and you can set any value between 1 and 24 hours. This setting applies per connection.
Note: IdP Role Mapping is currently supported for Okta, OneLogin, and Microsoft Entra ID. To know how it works, refer to IdP Role Mapping.
Test SSO
Before enabling this connection, it is recommended that you test the settings configured so far. To do so, perform the following steps:
- Click Test SSO. Contentstack opens the Login via SSO page, where you specify this connection's SSO ID.
- Click Continue to go to your IdP sign-in page.
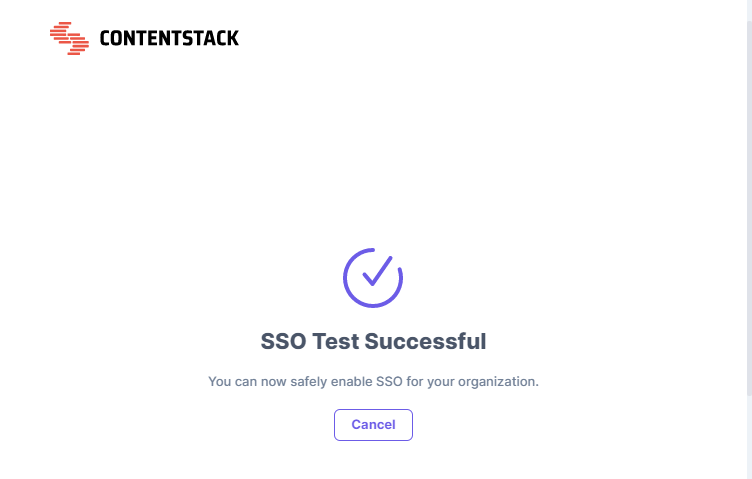
- Sign in to your account. If you are able to sign in to your IdP, your test is successful. On successful connection, you will see a success message.
Enable SSO
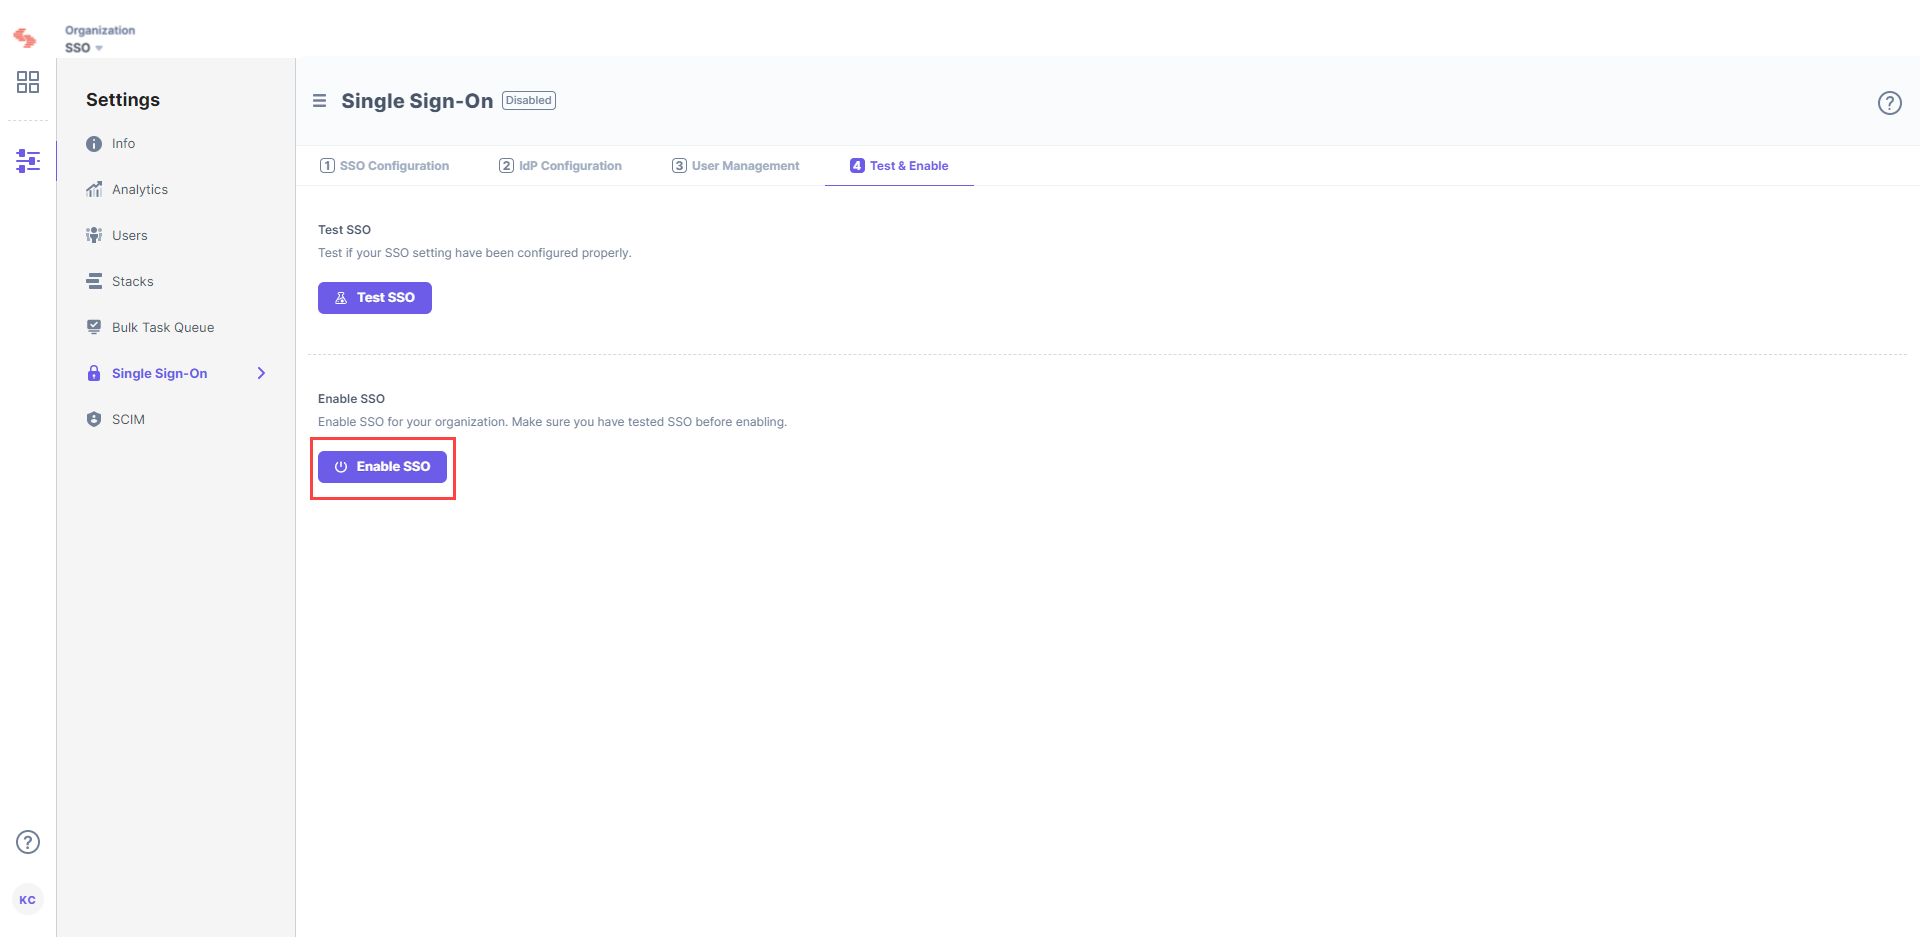
Once you have tested your settings, click Enable SSO to enable this connection. Confirm your action by clicking Yes.
Once enabled, users can access the organization through this connection. You can disable it from the same page at any time.
Note: The first connection you enable becomes the organization's primary connection. In an organization with more than one connection:
- Every organization invitation email contains a single SSO login link, the one for the primary connection. Distribute the login URL of each non-primary connection to the users who authenticate through it.
- You cannot disable the primary connection while other active connections exist. To turn off SSO for the whole organization, disable every secondary connection first, and then disable the primary connection.
For the full set of connection actions, refer to Manage SSO Connections.
Additional Resource: To add more identity providers, refer to Configure Multiple Identity Providers. To import Azure AD B2C's metadata instead of entering details by hand, refer to Import IdP Metadata.
More articles in "SSO Guides"
